

Hello, guys! I didn’t post a Tutorial for a while, so here I am ;)
Fringed Clutch! Some of you already saw these pics on my Facebook/Twitter/Instagram channels, but today I want to share with you HOW TO do it! I swear it’s really easy!
–
Buondì, ragazzi! E’ da tanto che non pubblico un Tutorial, quindi eccomi qui :)
Clutch con frange! Sicuramente alcuni di voi l’avranno già vista sulla mia pagina facebook/twitter/instagram , ma oggi voglio spiegarvi come realizzarla. e vi assicuro che è davvero semplicissimo!
What you need:
– leather/leatherette ( two different colors or just one color, it depends by your taste )
– zipper
– scissors
– thread and needle / sewing machine
–
Cosa vi occorre:
– pelle/ecopelle ( o due colori diversi o della stessa tinta, a seconda dei vostir gusti )
– zip
– forbici
– ago e cotone / macchina per cucire
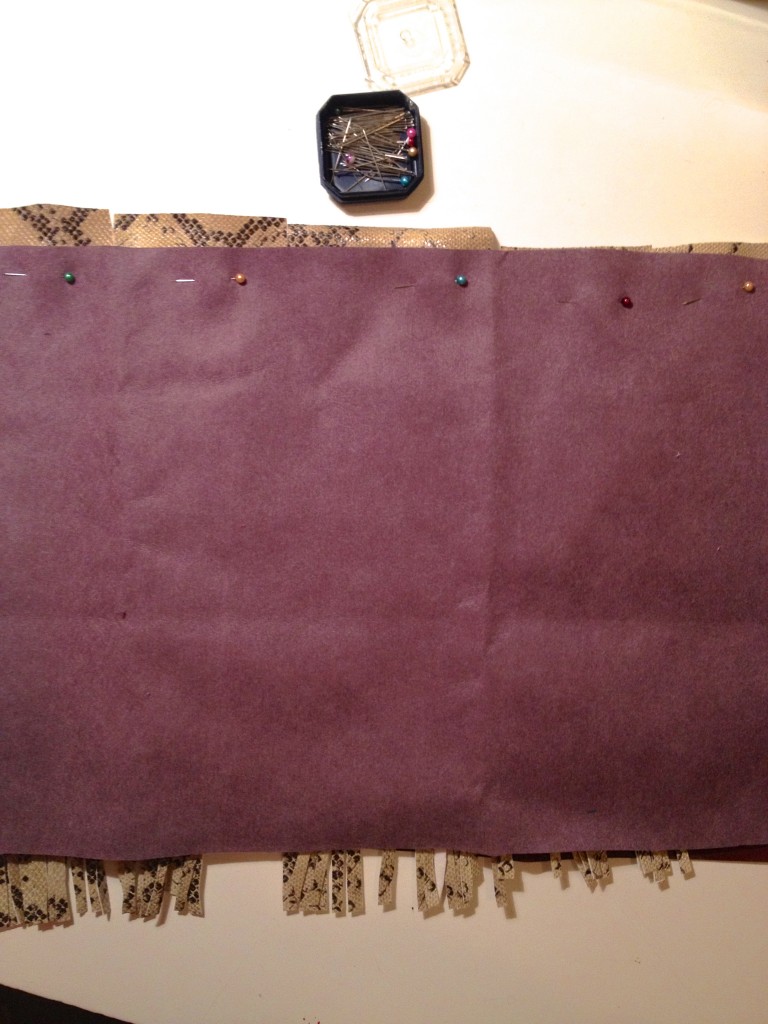
Step 1 :
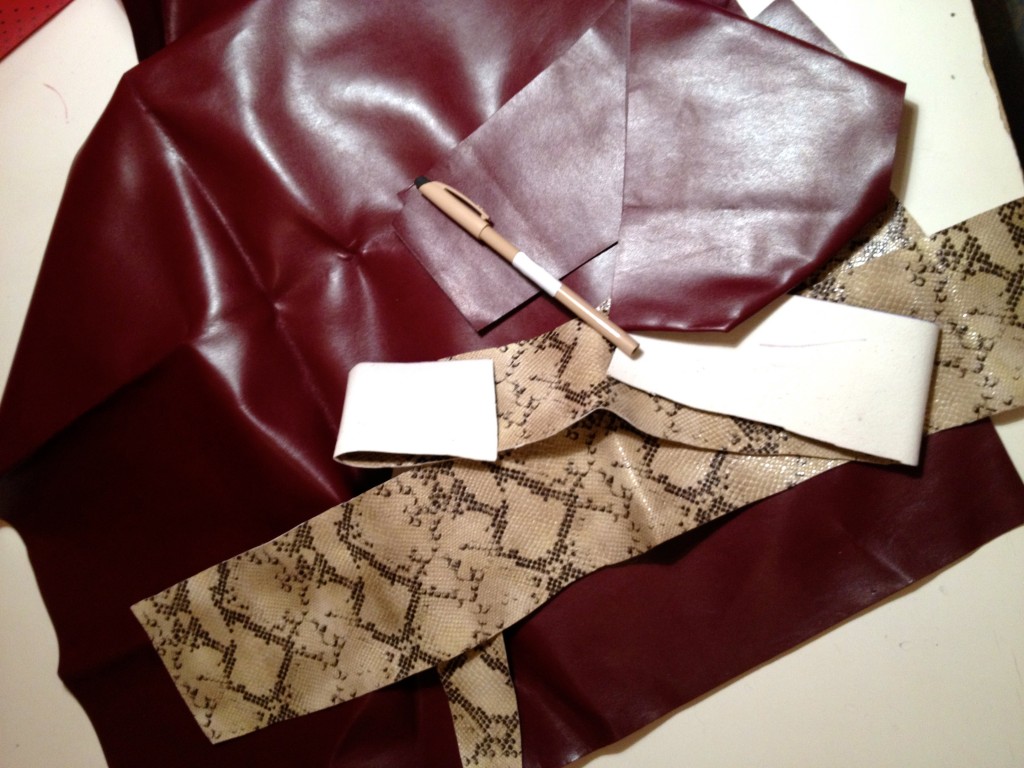
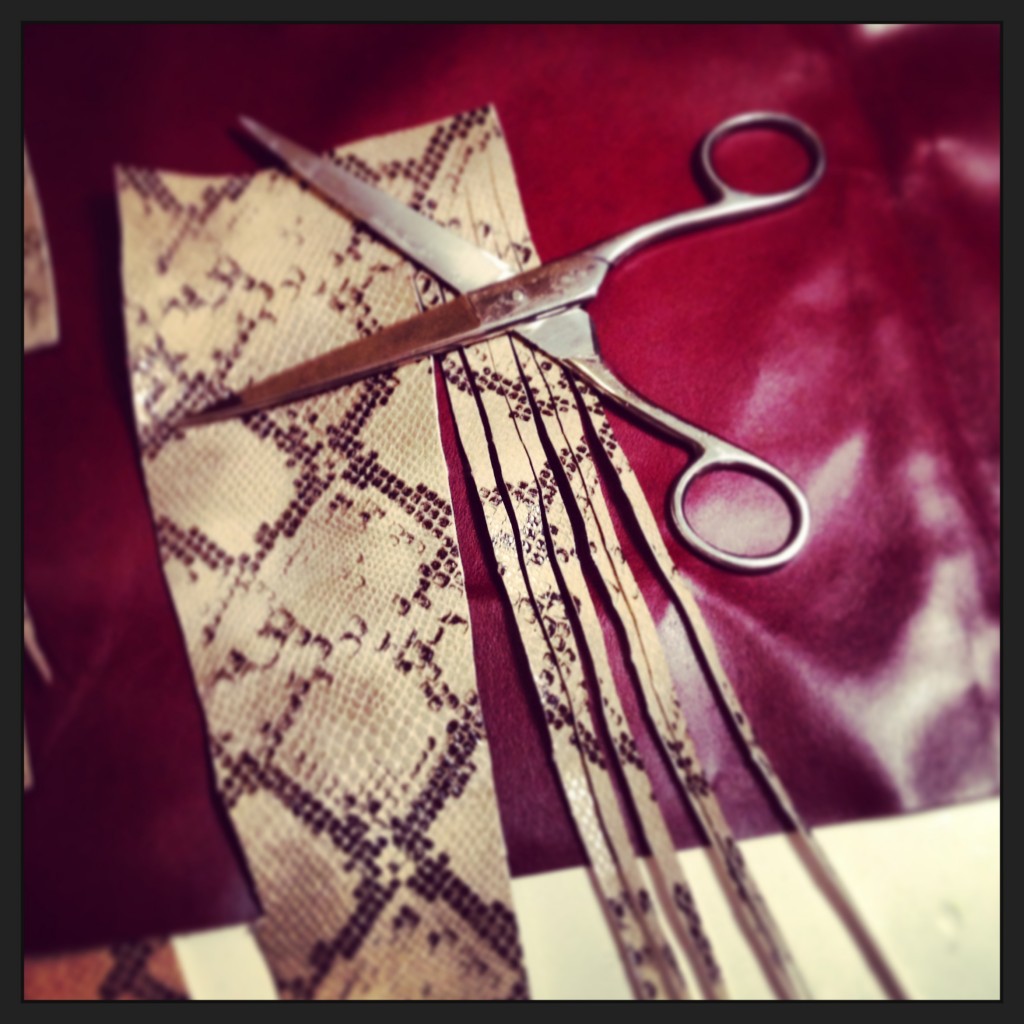
Cut two rectangles of the dimensions you like, ex. 35cmx25cm, then cut another piece of leather/leatherette of the same width of your clutch. I suggest you to chose a length that would be at least as your clutch, maybe longer, or the fringes wouldn’t be “floaty”. Once you chose the length of your finges, cut the leather into little stripes , but leave a few cm on the top ( You’ll need them for sewing them ).
–
Fase 1 :
Tagliate due rettangoli della dimensione di cui volete la clutch, es. 35cmx25cm , poi tagliate un altro pezzo di pelle/ecopelle della stessa larghezza della clutch e della lunghezza che più vi piace. Vi suggerisco di fare questo secondo pezzo , che vi occorrerà per le frange, di farlo almeno della lunghezza della clutch, altrimenti le frange restano rigide e non hanno quel bell’effetto “fluente”. Una volta stabilite le misure delle frange, tagliate a listarelle sottili il pezzo di pelle/ecopelle lasciando almeno un paio di centimetri nella parte superiore ( vi servirà per la cucitura ).
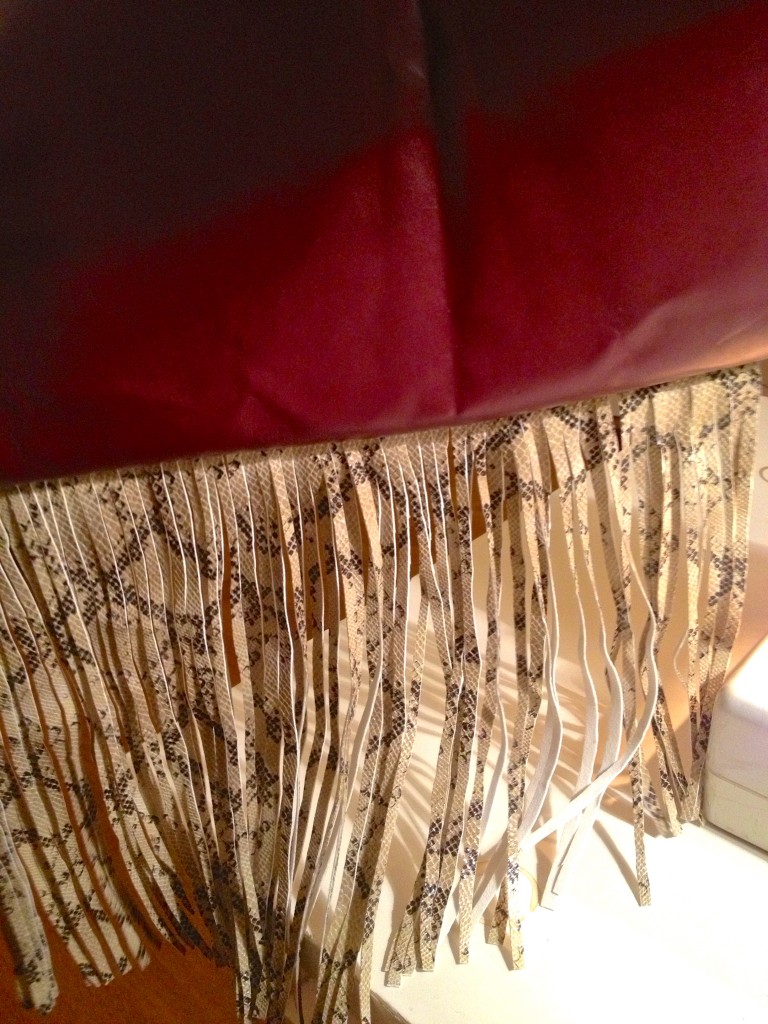
Step 2:
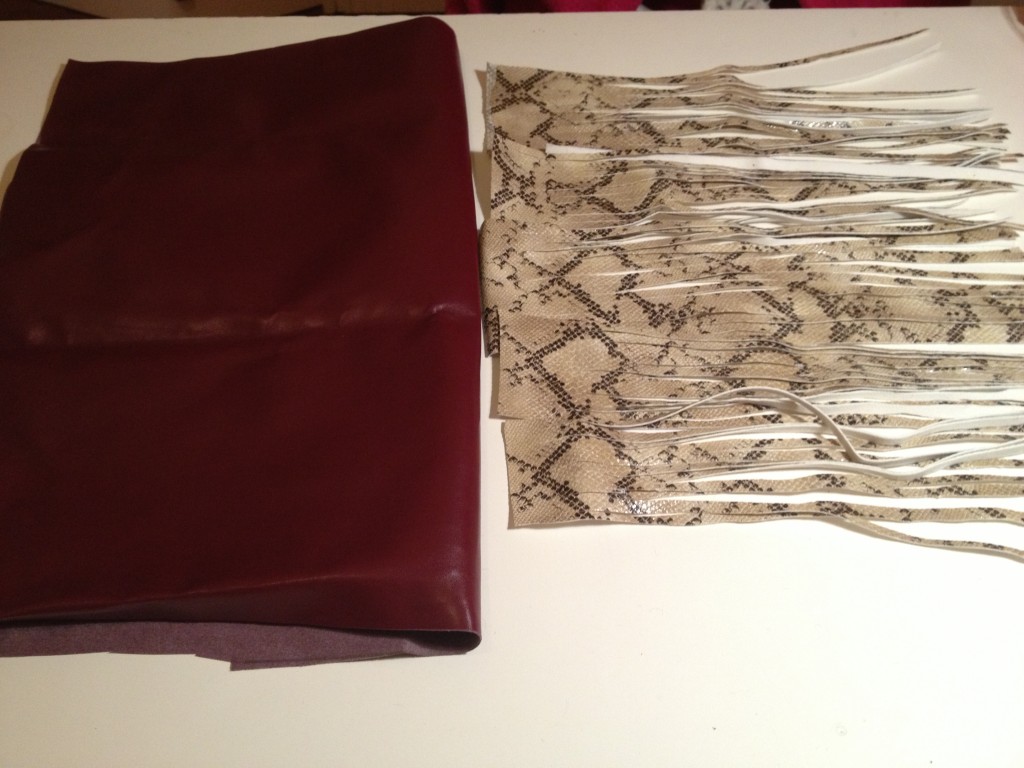
Place the two rectangles of your clutch inside out and place between them the fringes in order that, once you sewed and inside out again your clutch, the fringes will fall at the right side. Then sew your zipper and then the sides of your clutch. Put your clutch inside out… et VOILA’!
–
Fase 2:
Mettete al rovescio i due rettangoli di pelle ( cioè la clutch ) e appuntate all’interno le frange in modo che una volta cucita e risvoltata la clutch , le frange scendano dal lato giusto. Cucite quindi il fondo della clutch, cucendo assieme i due lembi della clutch e le frange assieme. Dopodichè cucite prima la zip e poi i due lati della clutch! Risvoltate dentro-fuori la clutch , et voilà!
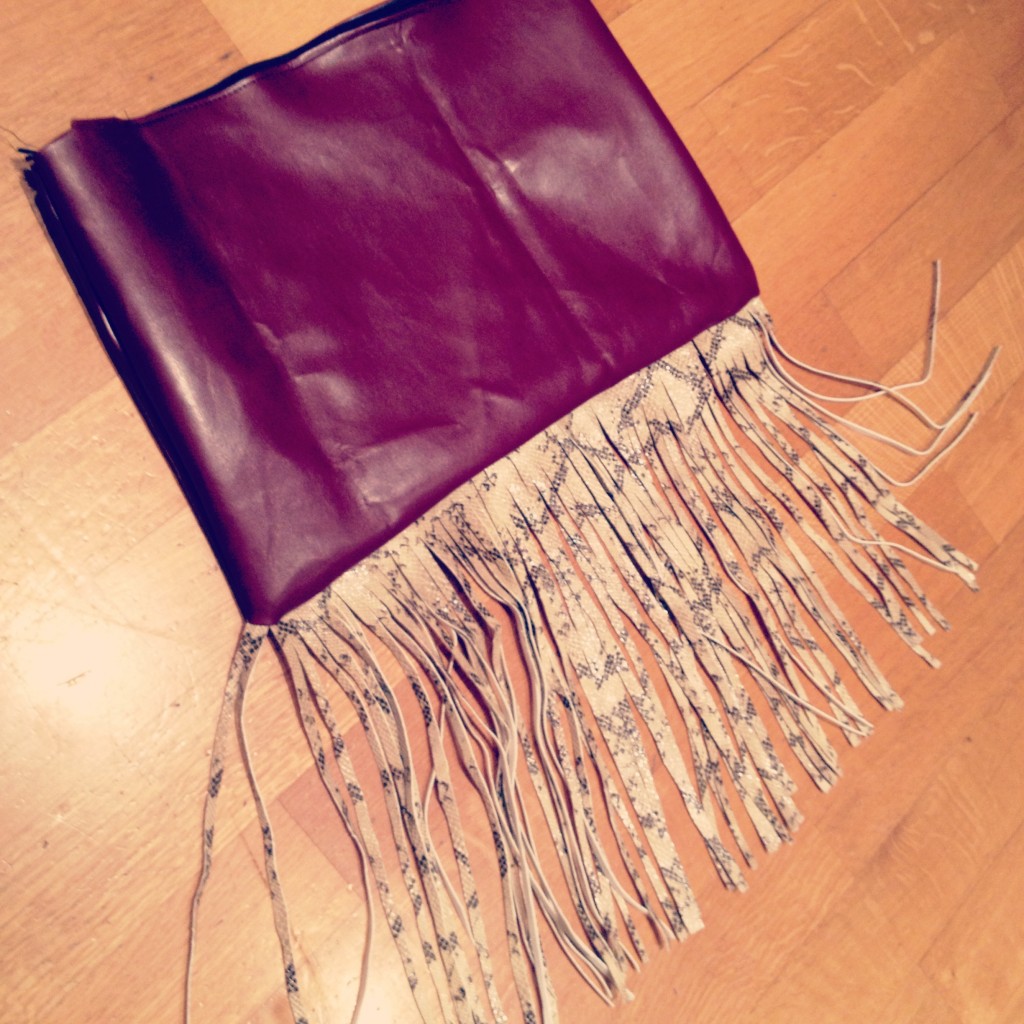
Here it is your new diy fringed clutch!
–
ecco la vostra clutch con le frange *_*
ps : I’m sorry about the photo’s quality, but I took them with my Iphone! :D Let’s make a fringed clutch and send me your pic’s creations to thefashiontwice@gmail.com ! Otherwise you’re not able to make one, but you like it, you can always buy one of my creations!
–
ps : mi spiace per la qualità delle foto ma quando creai questo DIY non pensai di farle con la reflex ed utilizzai l’Iphone :D Forza, create le vostre clutch tutte frange e inviatemi le foto delle vostre creazioni a thefashiontwice@gmail.com ! Mentre se proprio non siete in grado di crearne una, ma vi piacciono tanto, potete sempre acquistare una delle mie creazioni!

 Buondì! Oggi più che mai sul mio blog c’è un bel clima natalizio :D
 The last time I posted a tutorial was something like one year ago… and now I’m back with many ideas and crafts to share with you all.
