

 The last time I posted a tutorial was something like one year ago… and now I’m back with many ideas and crafts to share with you all.
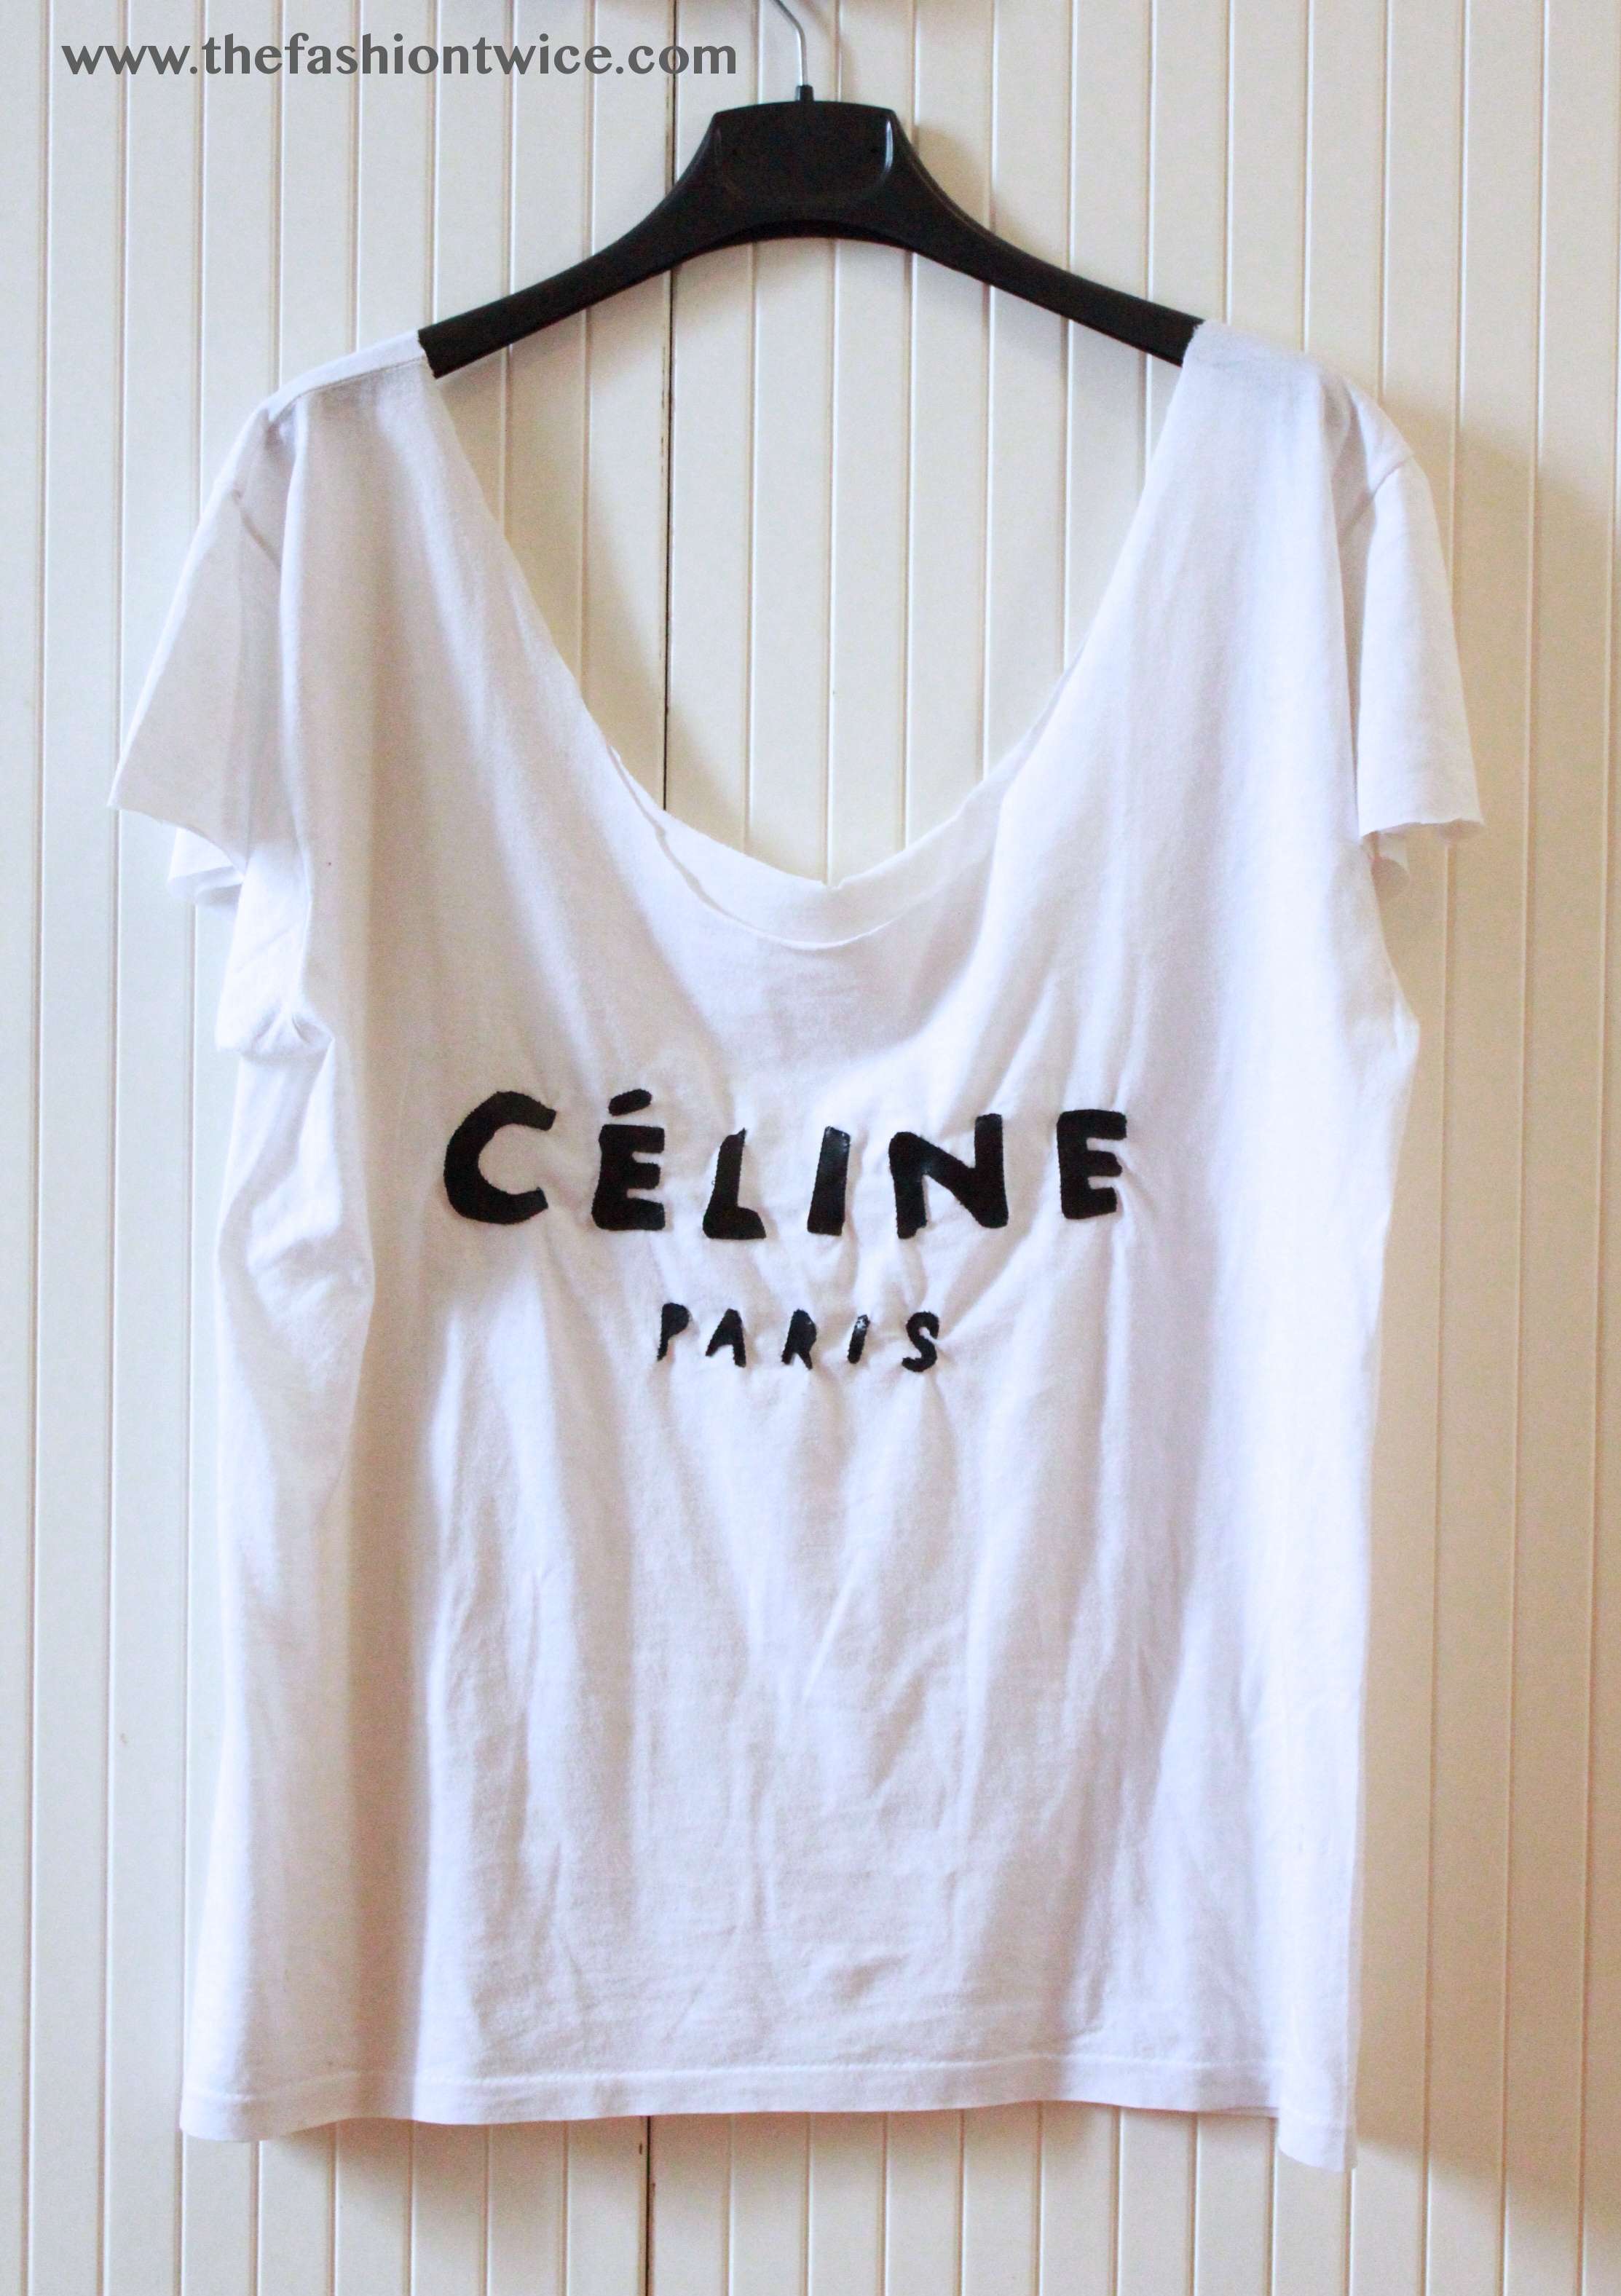
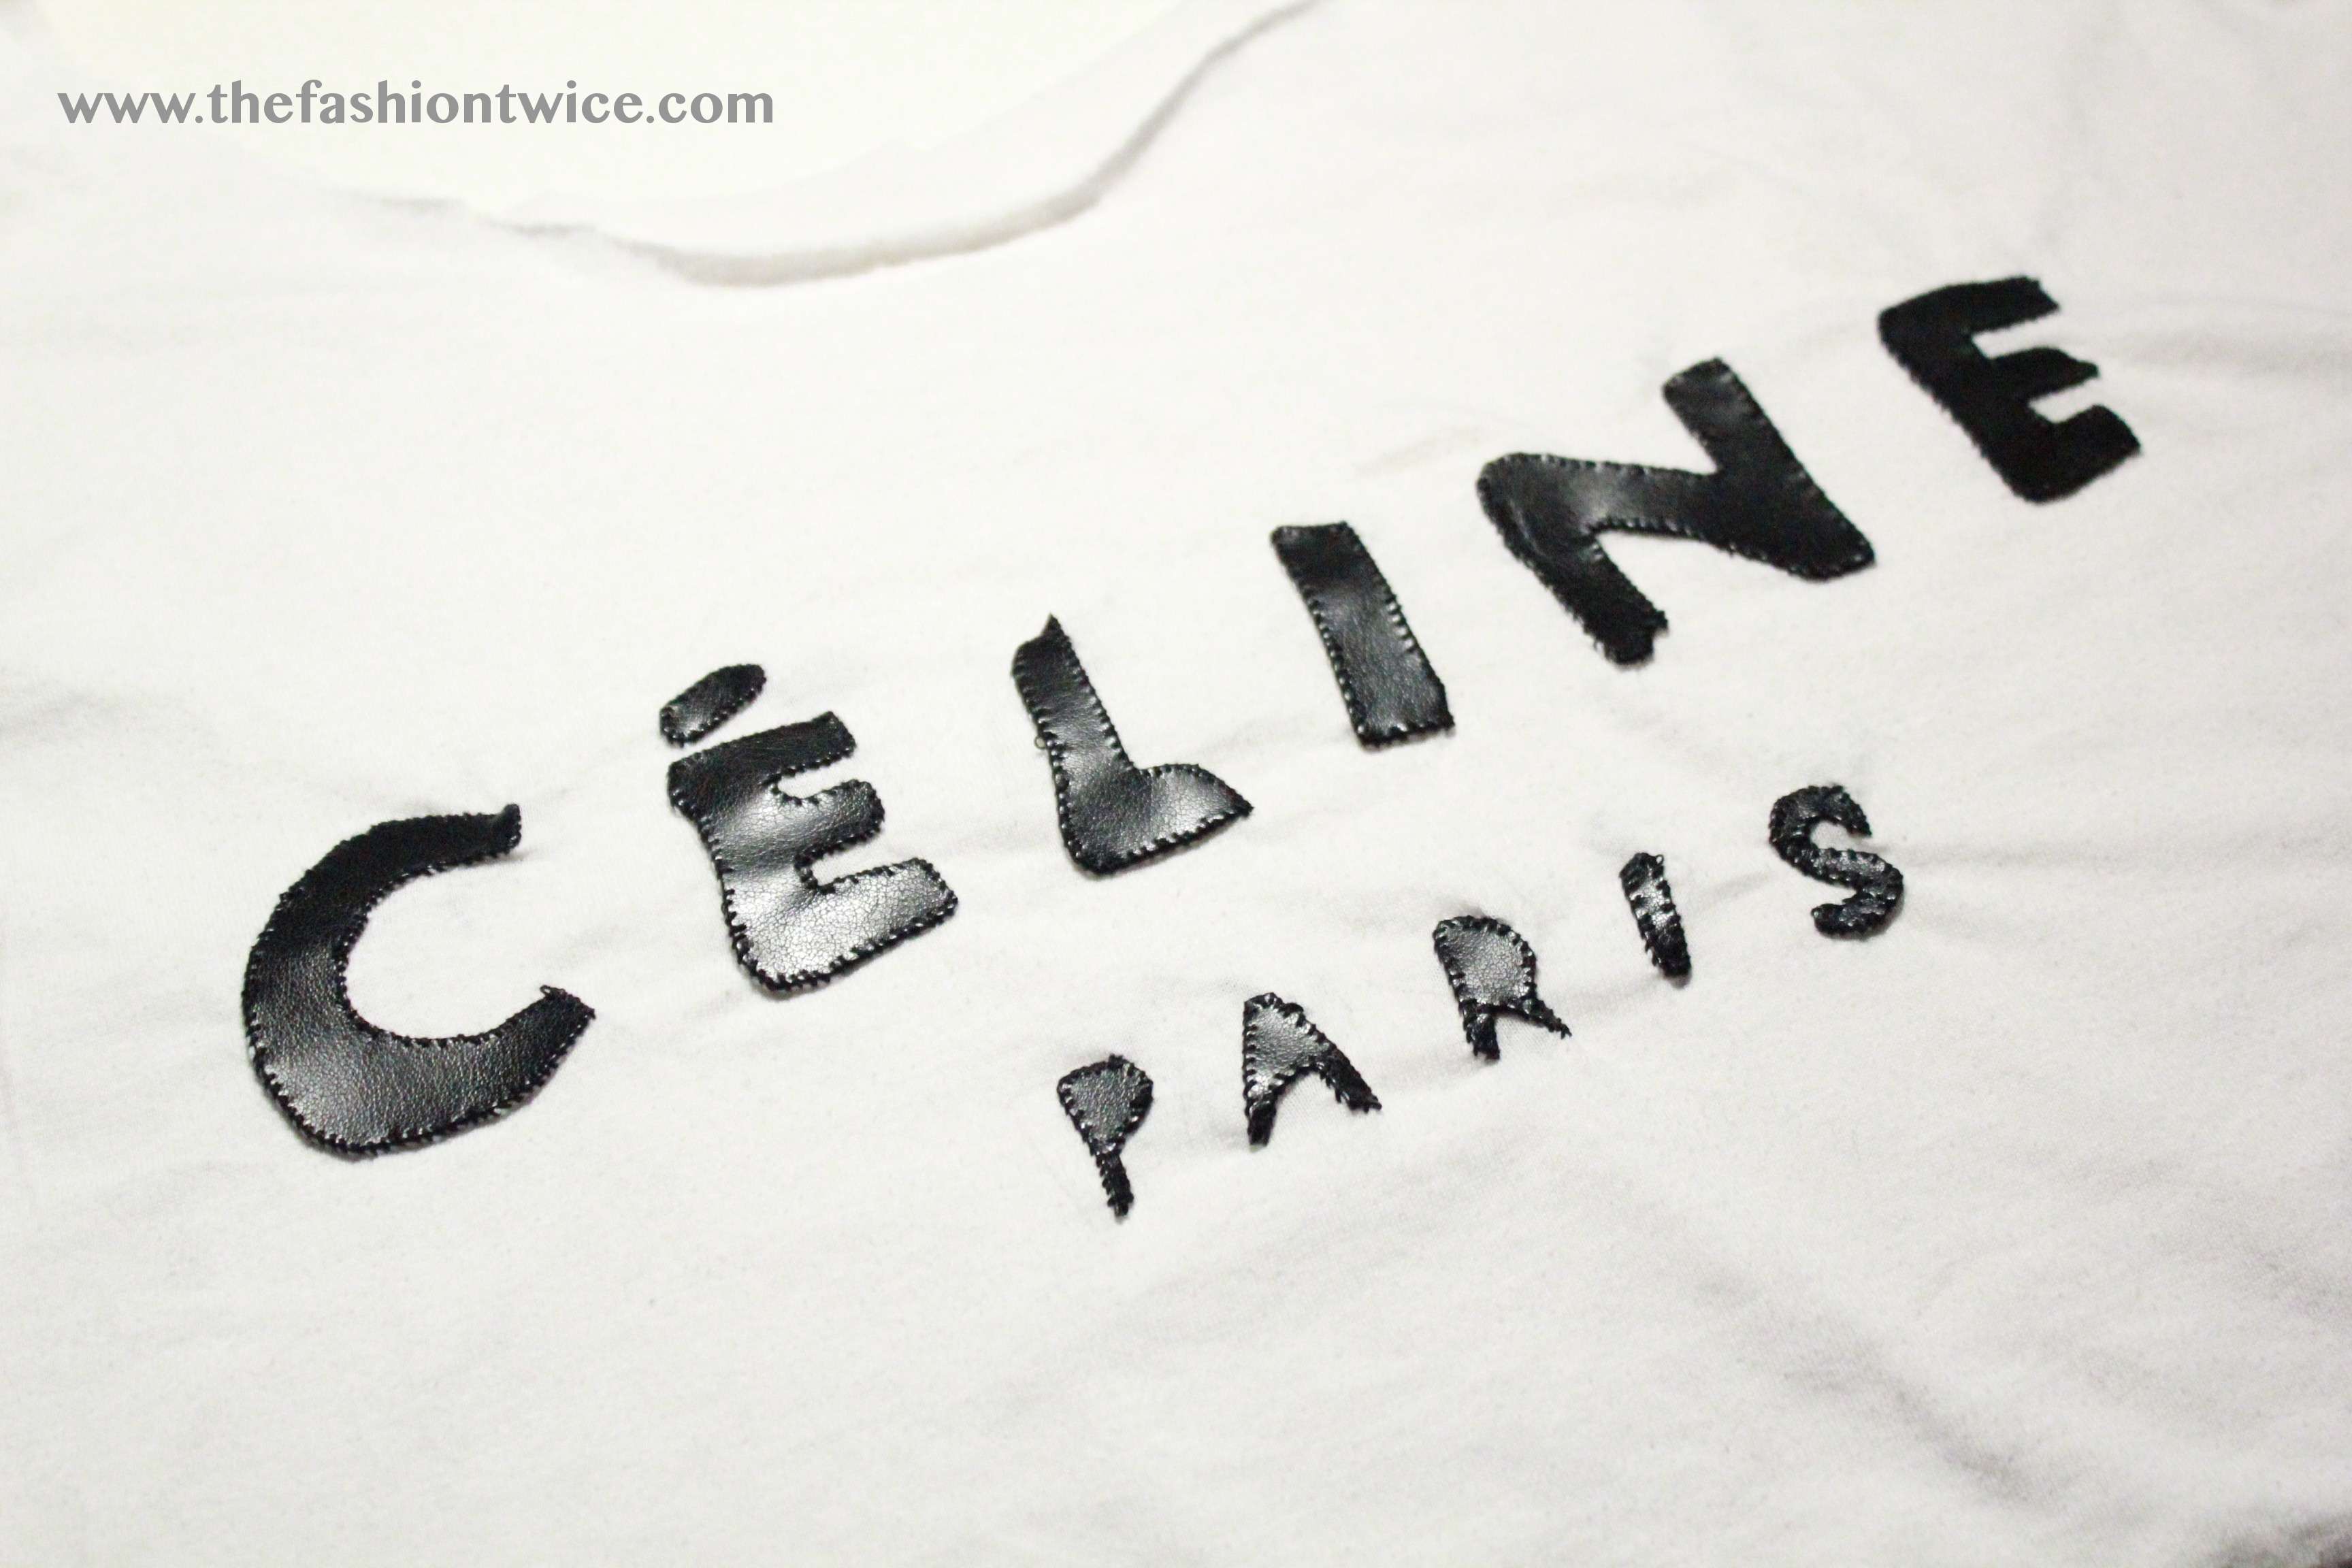
Everyone knows the “Céline Tee“, any fashionista gotta have it… I was looking for one of these and the prices were crazy… then I thought ” Why can’t I do it by myself?” and here we are :)
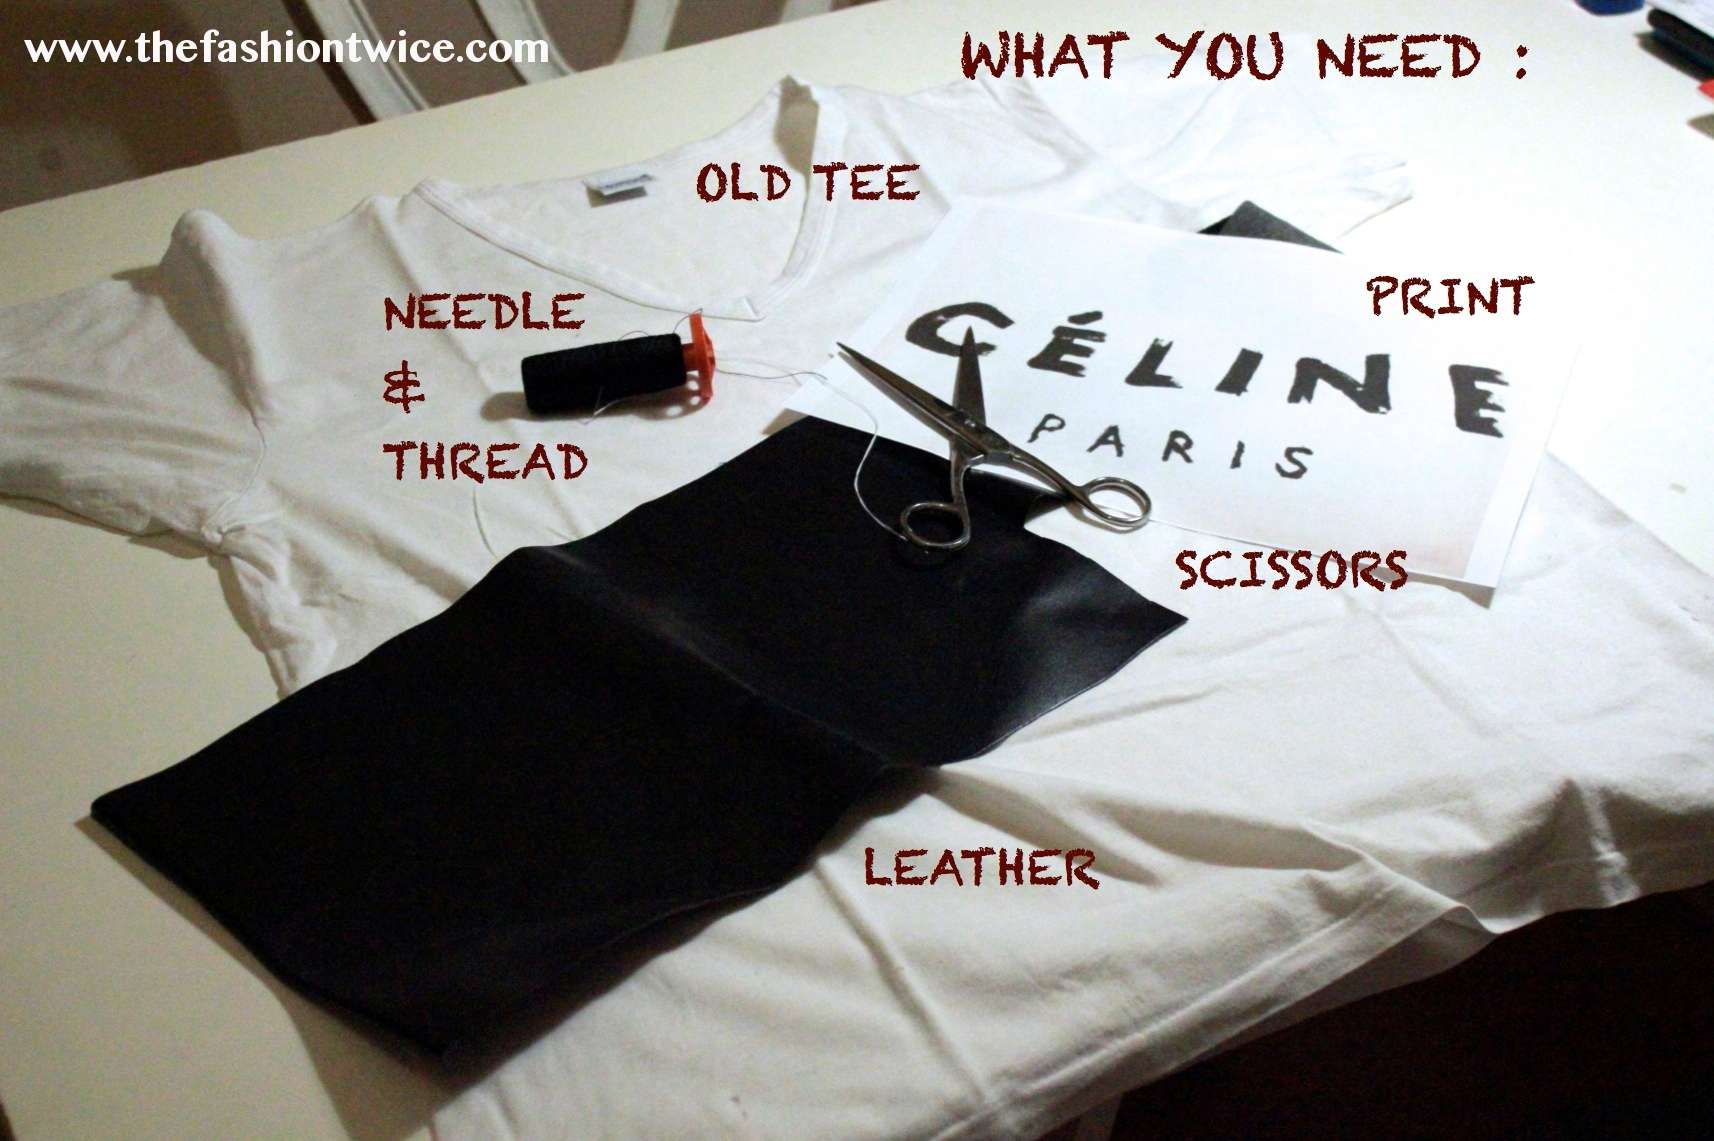
I made a little difference that it’s the leather written ( the original is printed ). If you want it like the original one you just need to buy some paint for fabrics and a brush, you will do it in a minute. If you like my leather version , just keep on reading :)
Let’s START!
L’ultima volta che ho pubblicato un tutorial è stato circa un anno fa… ma ora sono tornata con tante nuove idee e progetti da condividere con tutti voi.
Tutti conoscono ormai la famigerata “Tshirt Céline“, ogni fashionista dovrebbe averla… cercando qua e là nel web una di queste tee mi sono imbattuta in certe con dei prezzi terrificanti e quindi ho pensato “Perchè spendere tanti soldi se invece posso farla da me?” e quindi eccoci qui!
Ho fatto solo una piccola variazione con quella originale, ossia la mia è fatta con le lettere in pelle. Se volete fara identica all’originale ci metterete un secondo e vi occorreranno solo un pennello e della pittura per indumenti. Se invece vi piace la mia versione, continuate a leggere!
INIZIAMO!
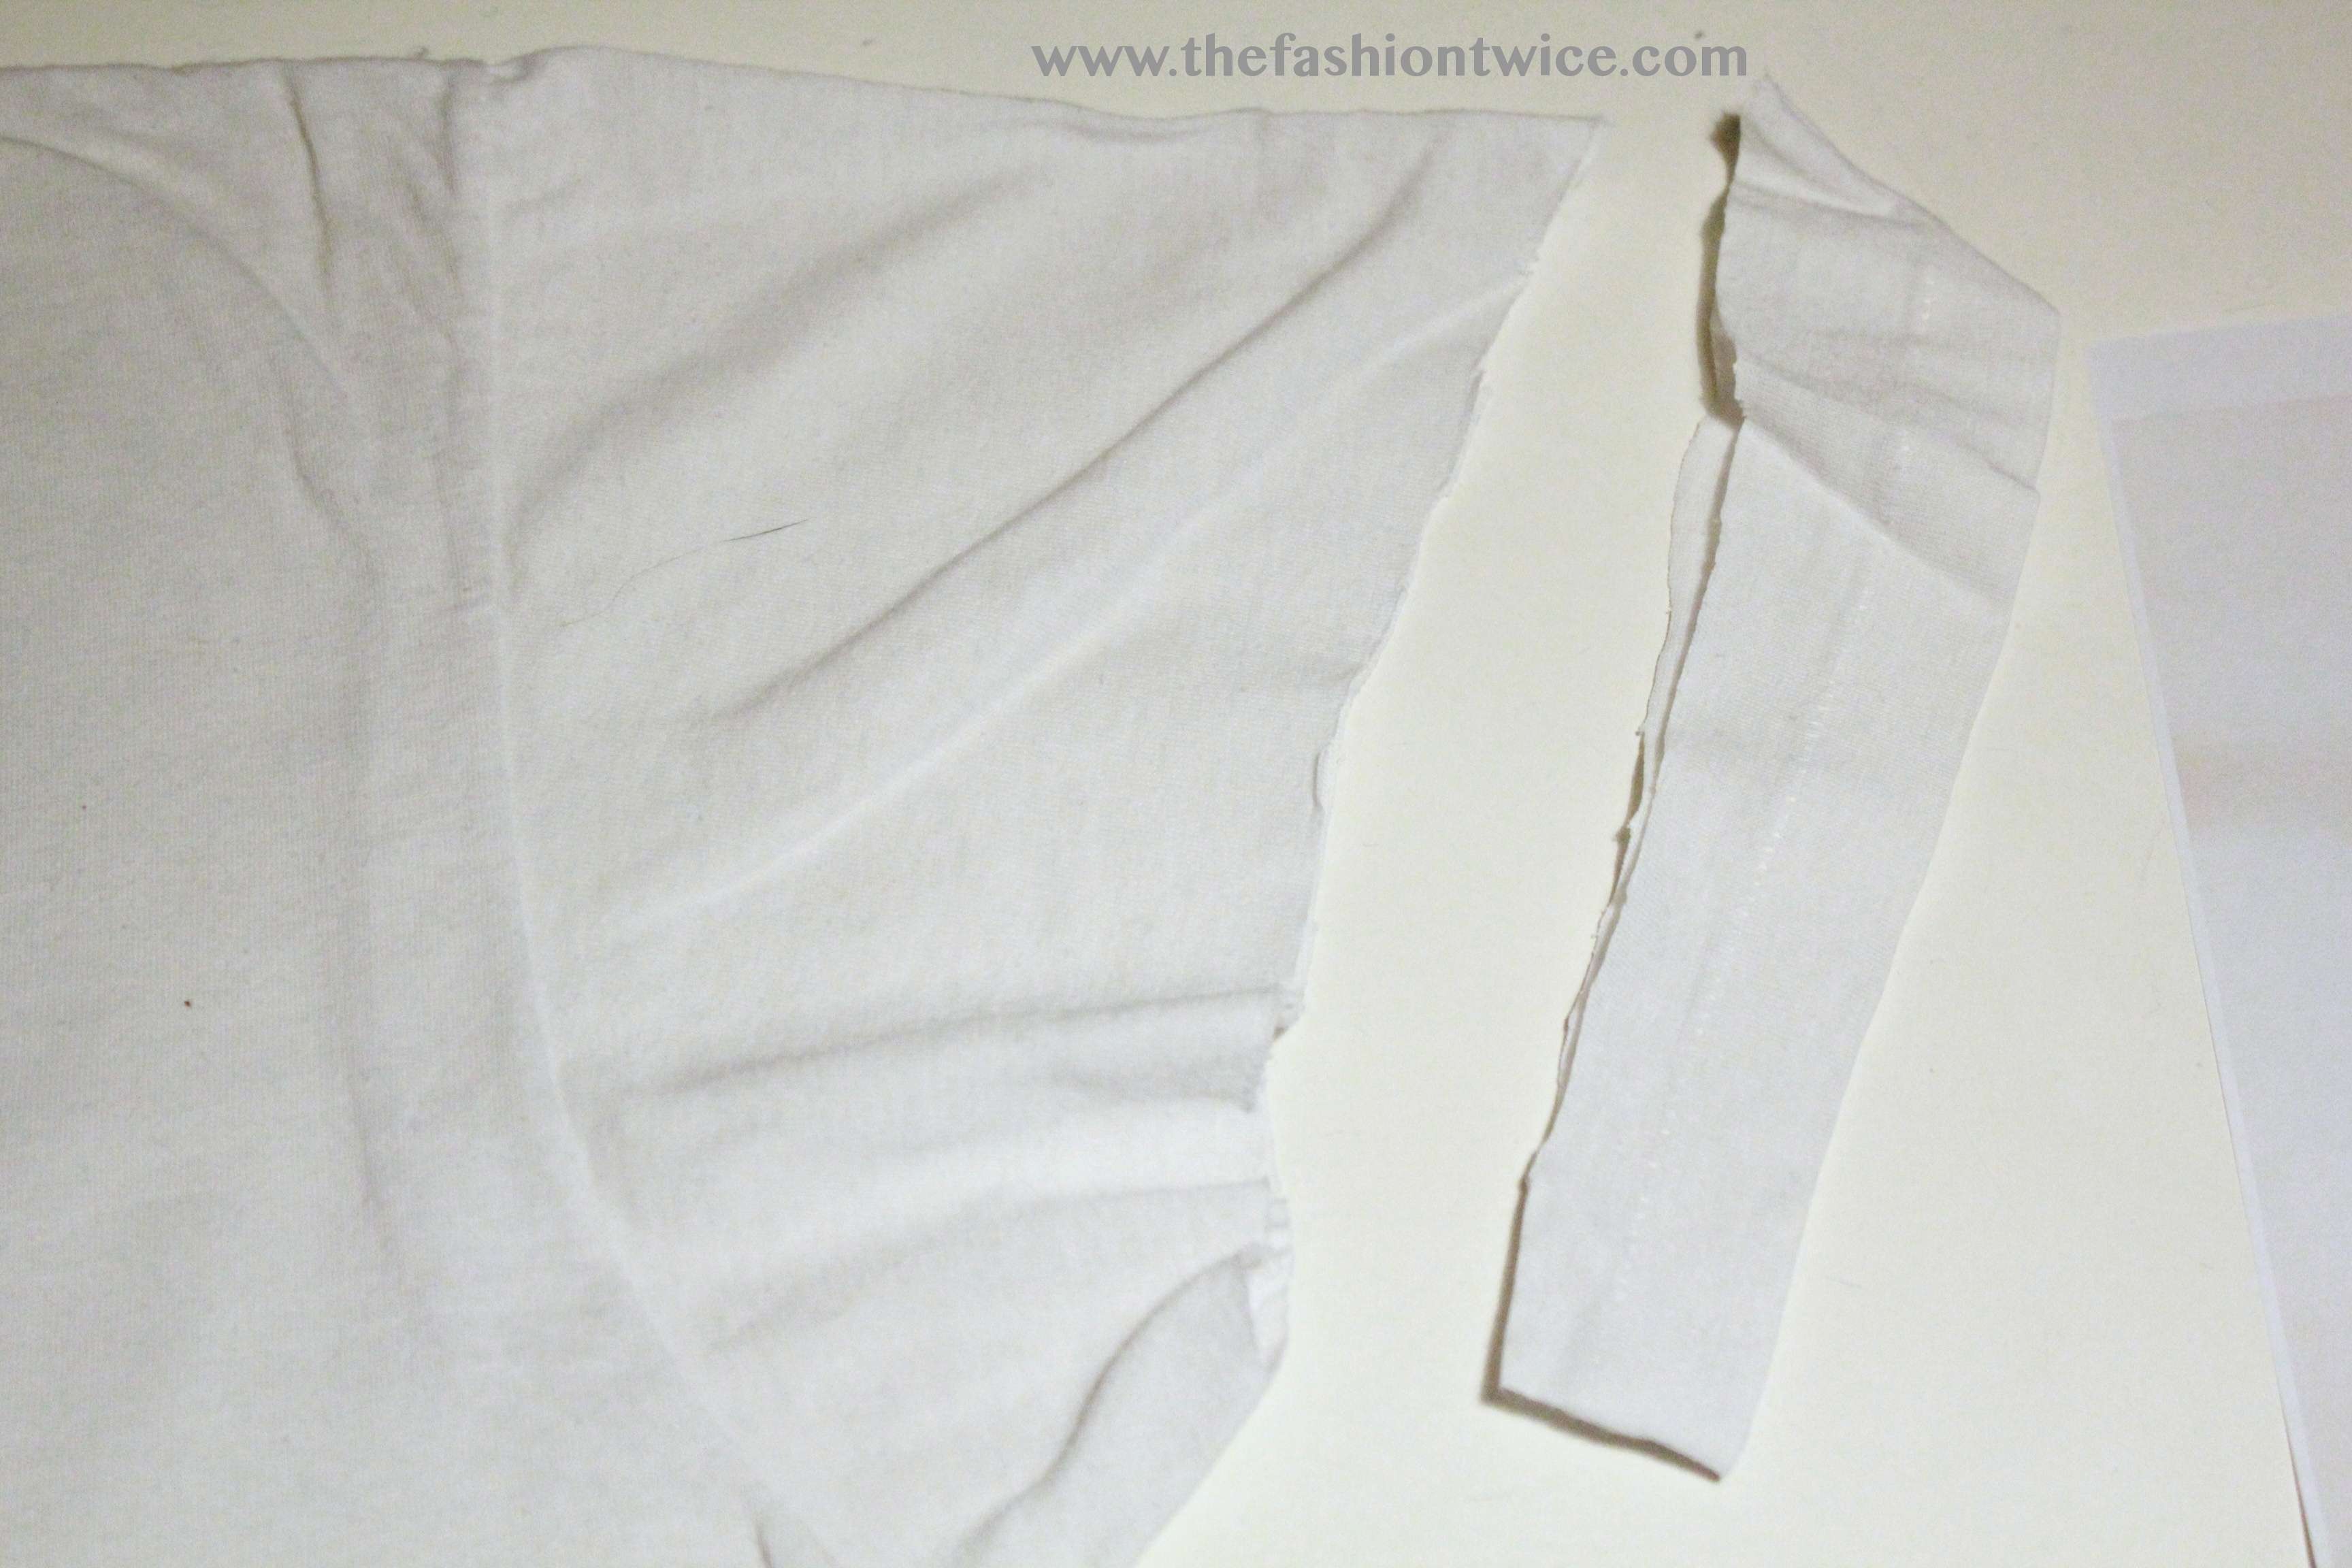
1ST STEP:
Pick an old tee from your father/boyfriend/brother/husband wardrobe and cut the neck and the sleave borders ( or leave them if you like them… mine was awful ).
1° FASE:
Prendete una vecchia t-shirt dal guardaroba di vostro padre/fratello/fidanzato/marito e tagliate via il colletto e le maniche ( se vi piacciono lasciatele intatte, quelle della mia nn si potevano guardare XD ).

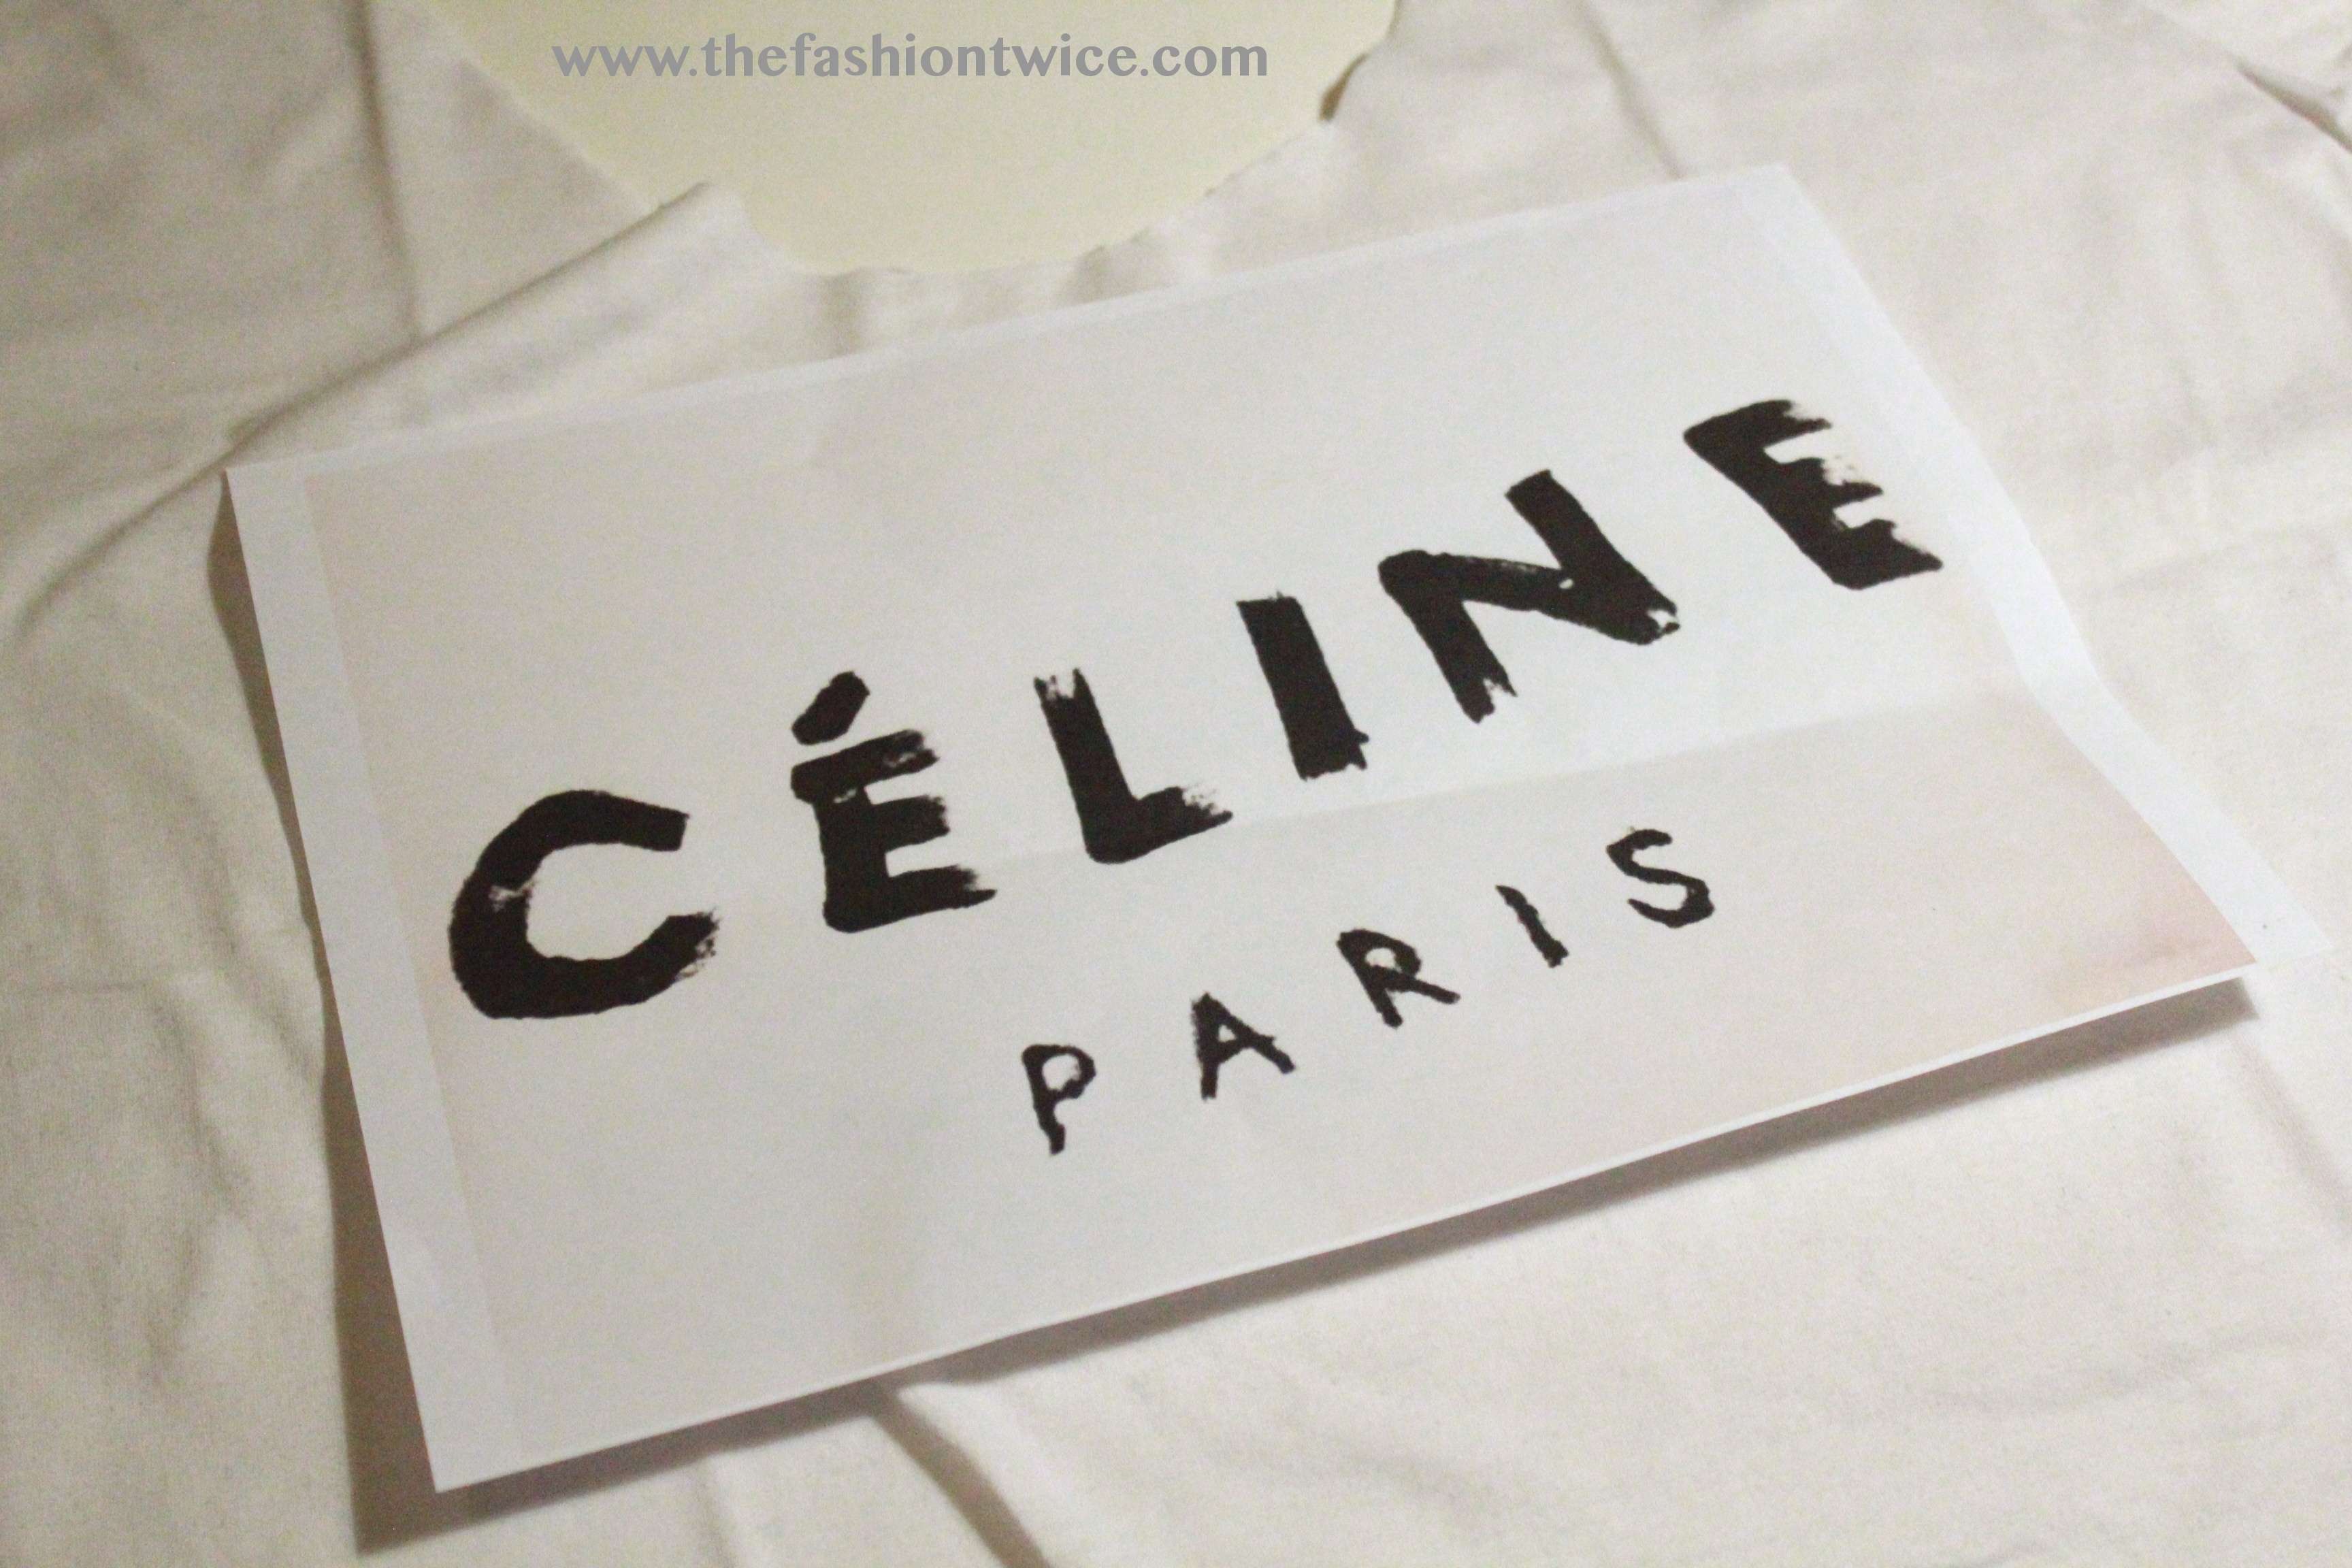
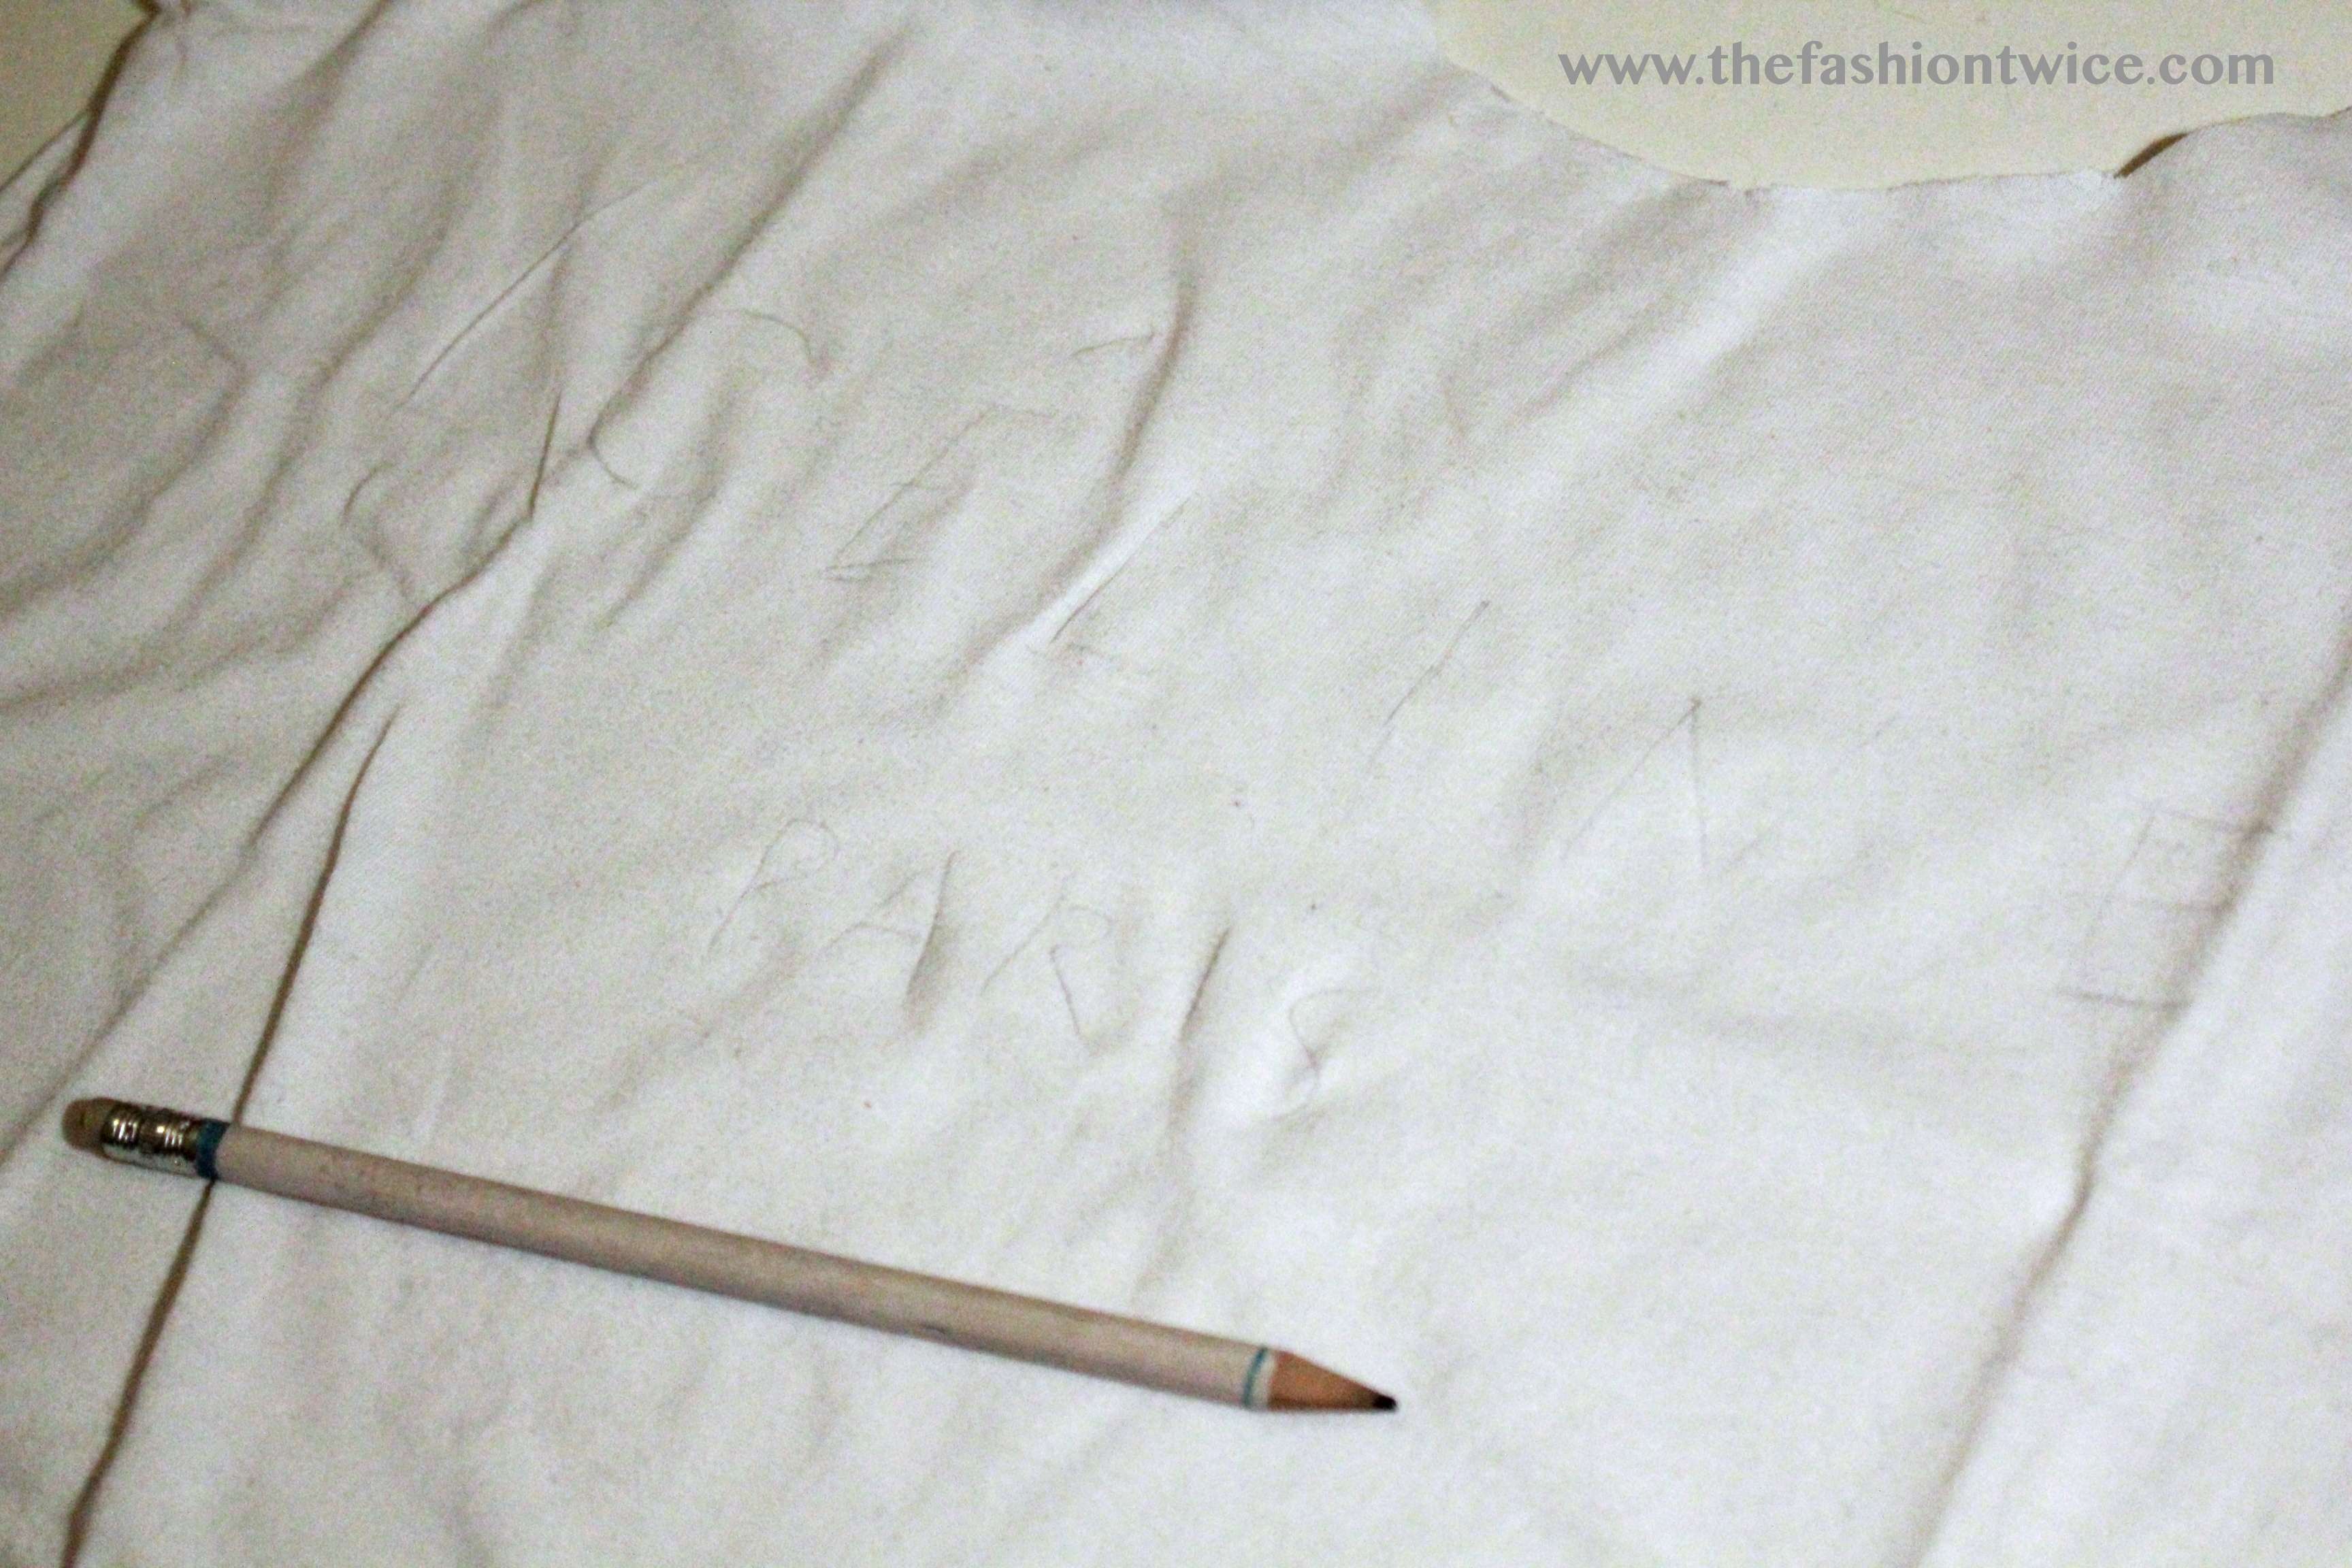
2nd STEP:
Place the paper with your written ( it has to be the dimension you’d like the written on your tee ) on the chest of your tee and draw the letters with a pencil on the fabric.
2° FASE:
Prendete il foglio con la stampa della scritta ( la scritta deve essere esattamente della dimensione che desiderate apporre sulla maglia ) e posizionatelo sul davanti della tshirt , quindi disegnate a matita le lettere sul tessuto.
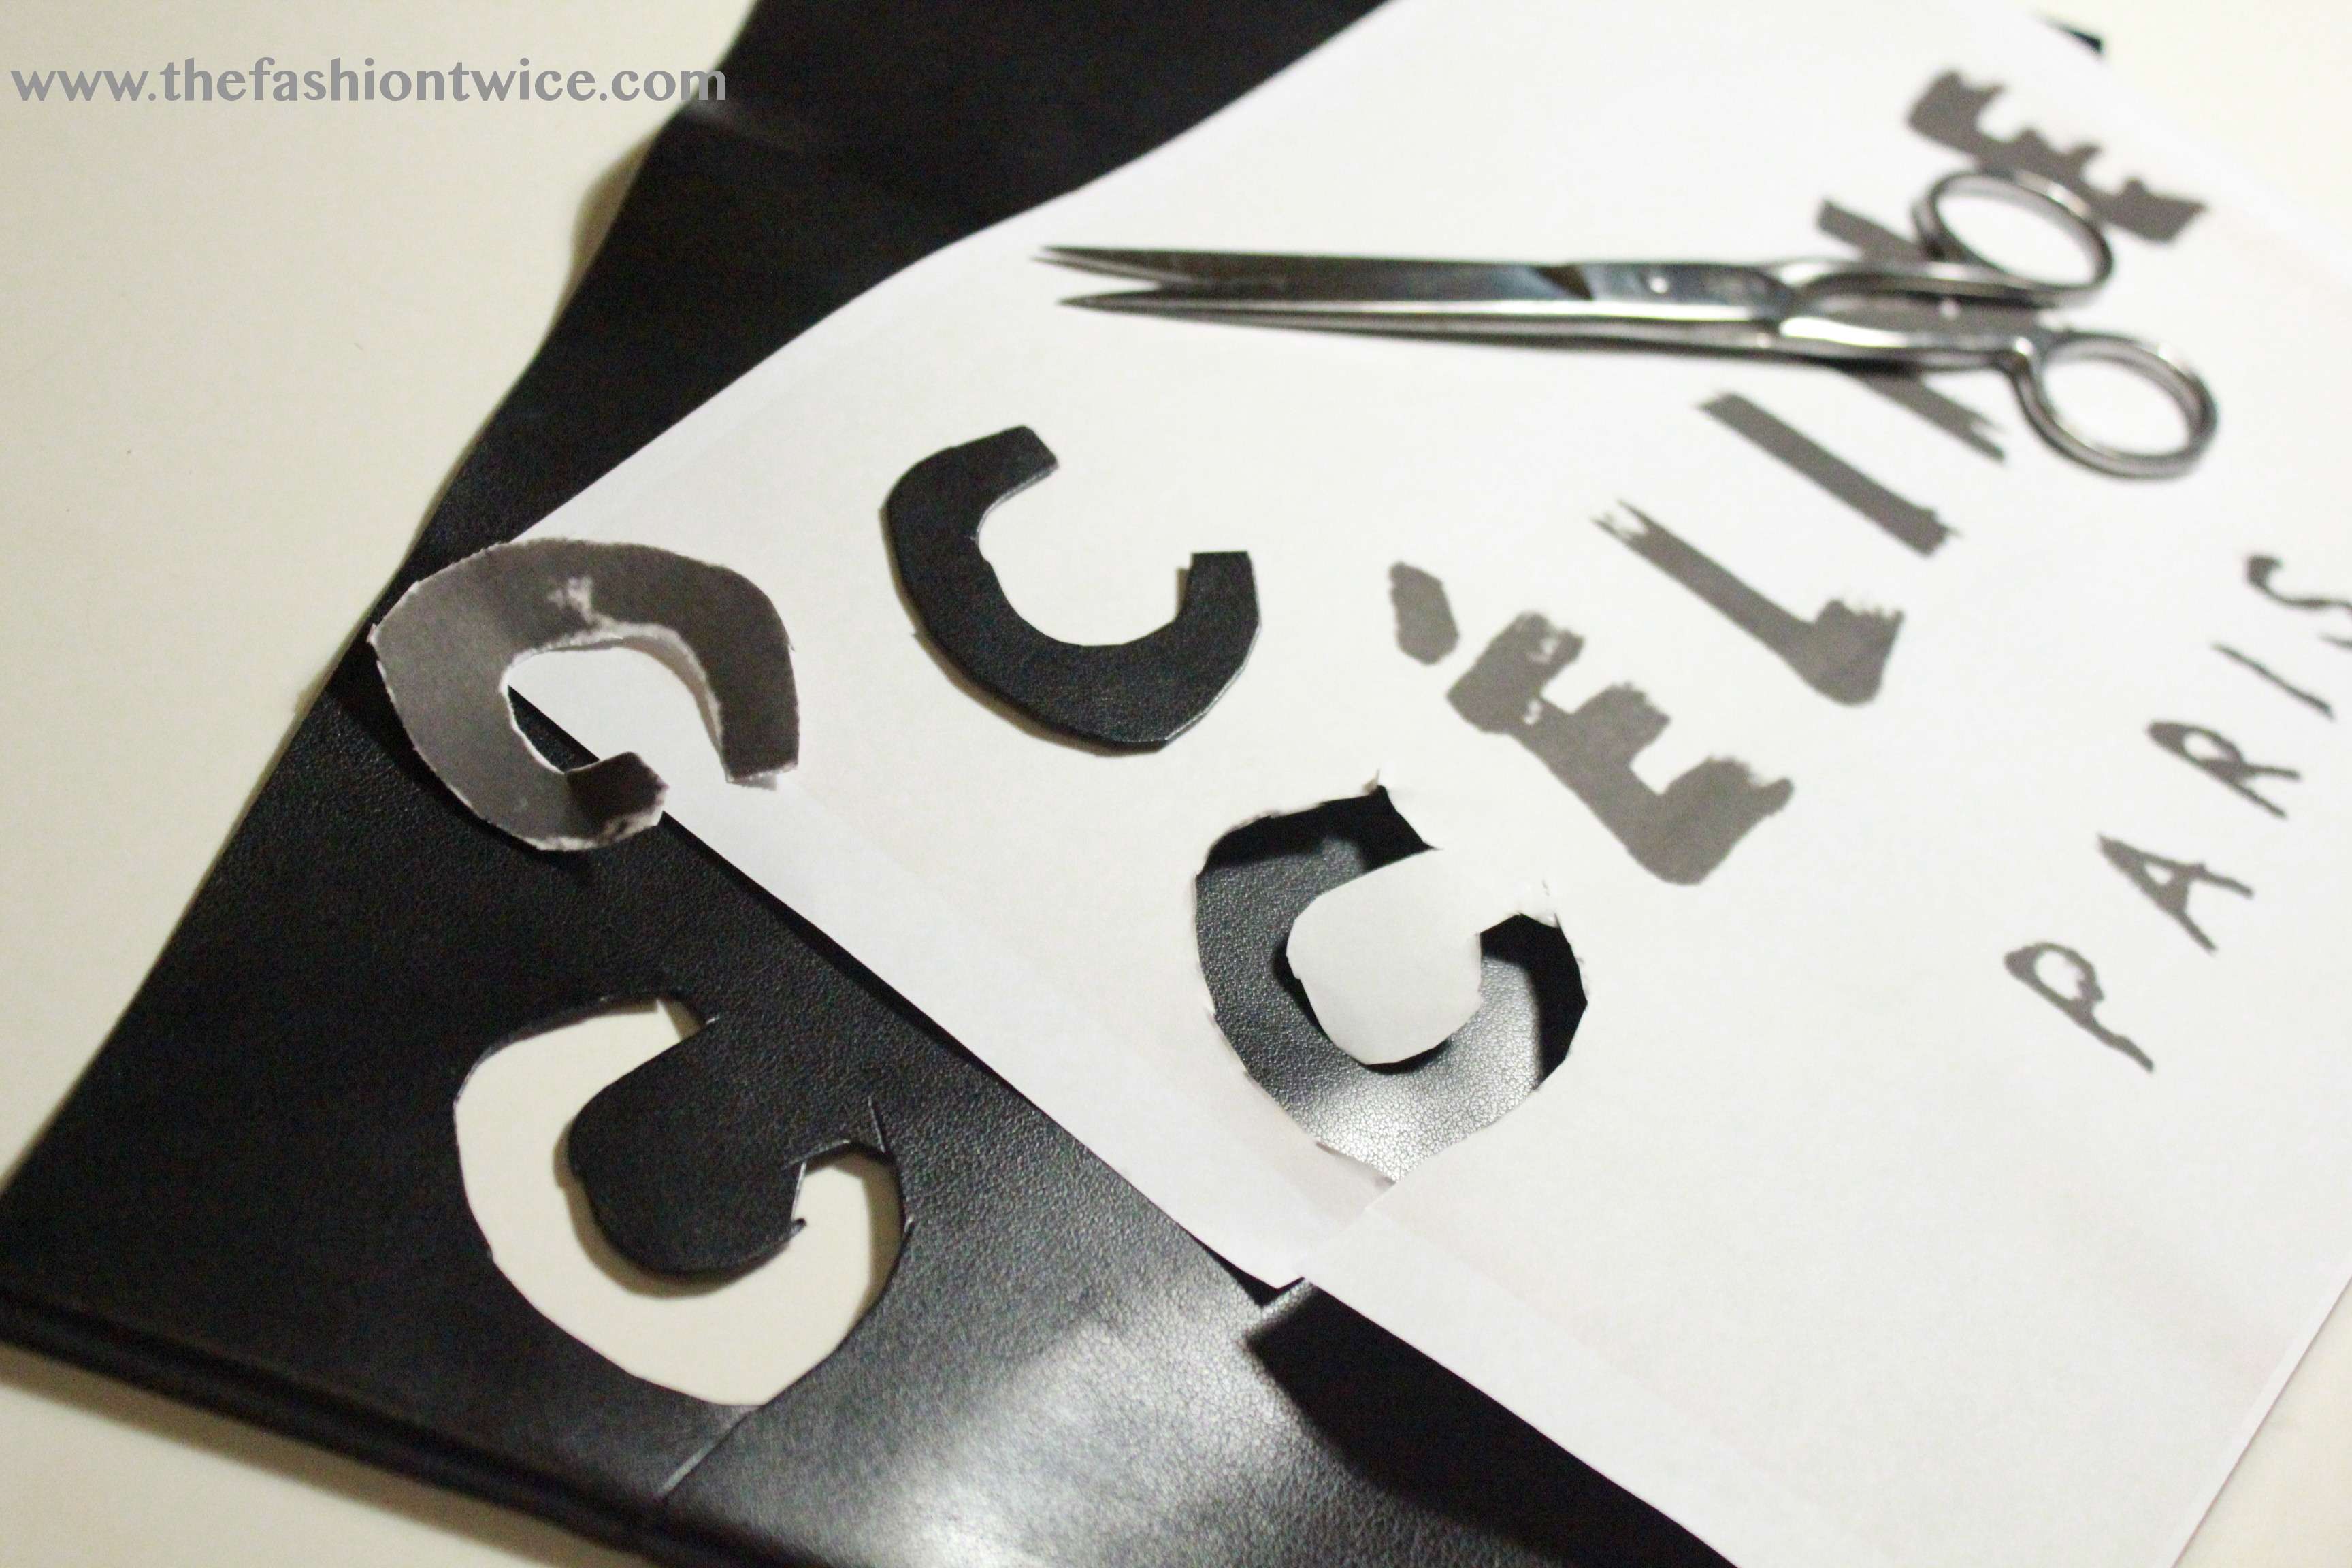
3rd STEP:
Cut the letters on the leather helping yourselves with the paper. They don’t have to be perfect, cause the original written it’s like all twisted, so just cut, don’t be too fussy!
3° FASE:
Ritagliate le lettere di pelle aiutandovi con il foglio che avete precedentemente utilizzato.
Le lettere non devono essere perfette, perchè se ci fate caso nella scritta originale sono un po’ distorte, quindi tagliate e basta, non siate troppo pignoli!

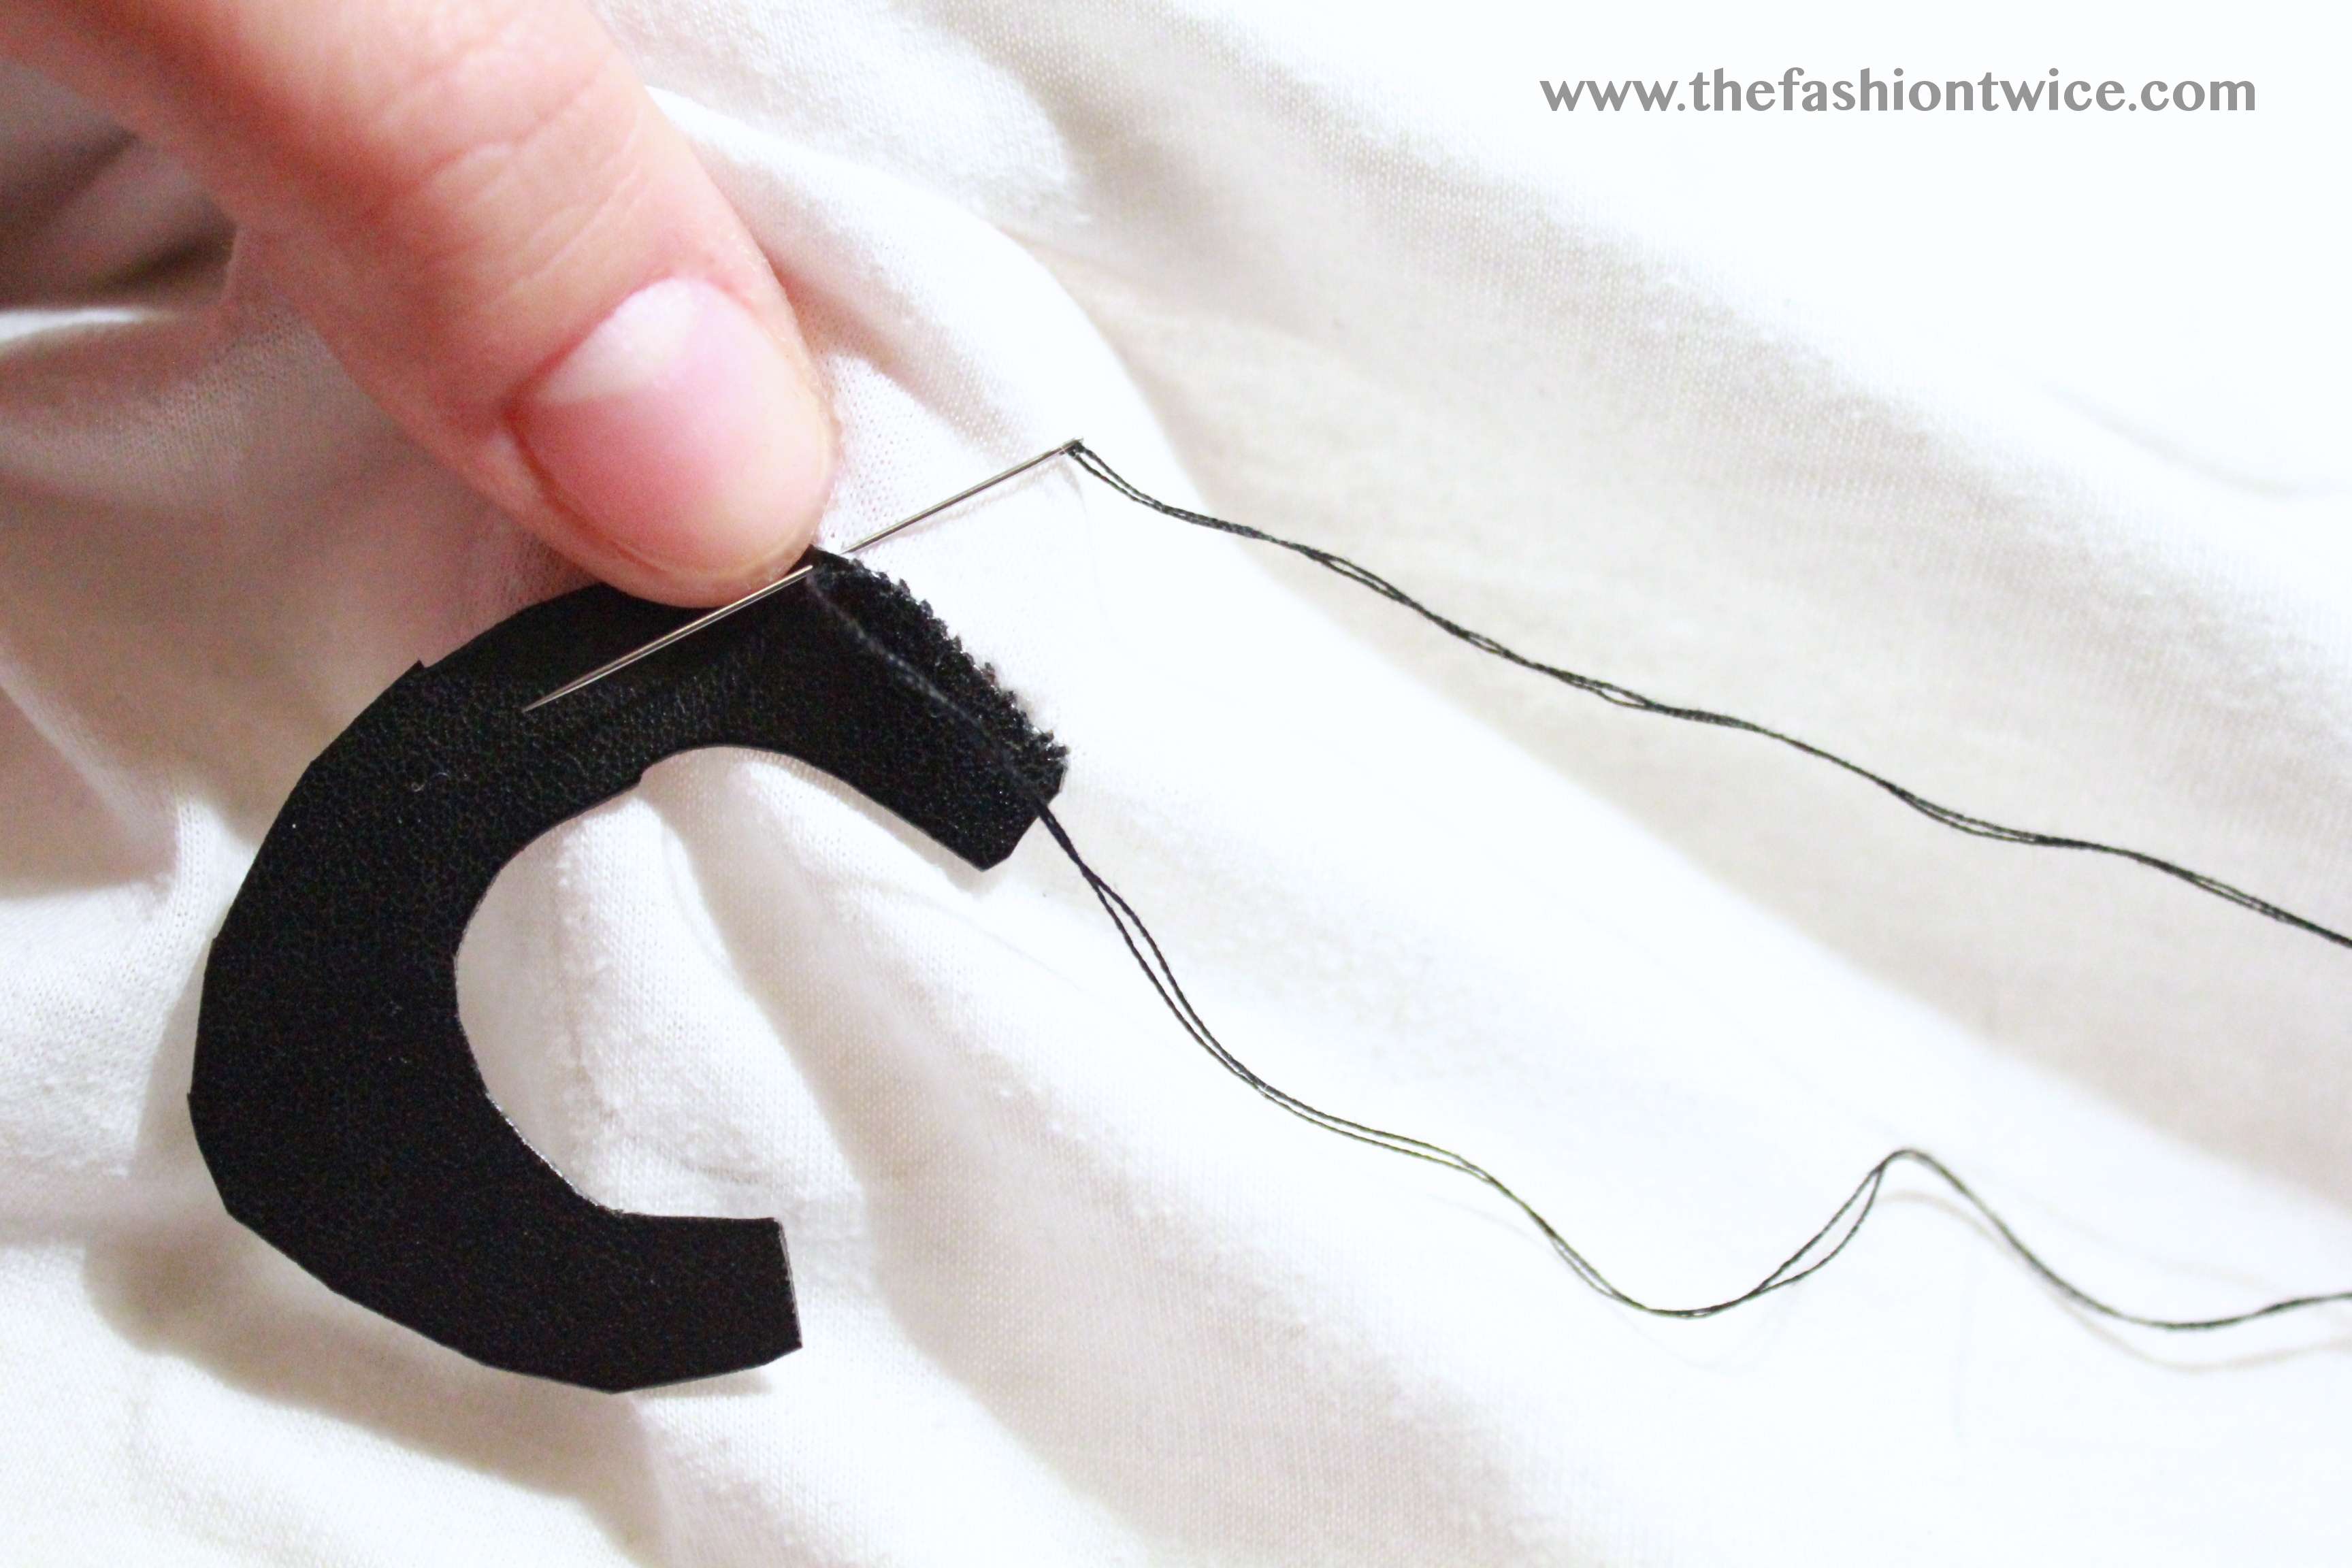
4th STEP:
This is the most boring part of the tutorial, just to let you know :P
You have to sew each letter ( paying attention to stay in the line ) with the thread. You have to do little stitches all over the letters. It ain’t difficult… just boring!
4° FASE:
Ecco la parte più noiosa di tutto il tutorial, giusto per mettervi al corrente :P
Ora dovrete cucire le lettere una ad una a mano sulla maglia ( facendo attenzione a non cucirle storte ). Dovrete fare dei punti piccolissimi tutto intorno ad ogni lettera. Non è difficile… solo estremamente noioso!
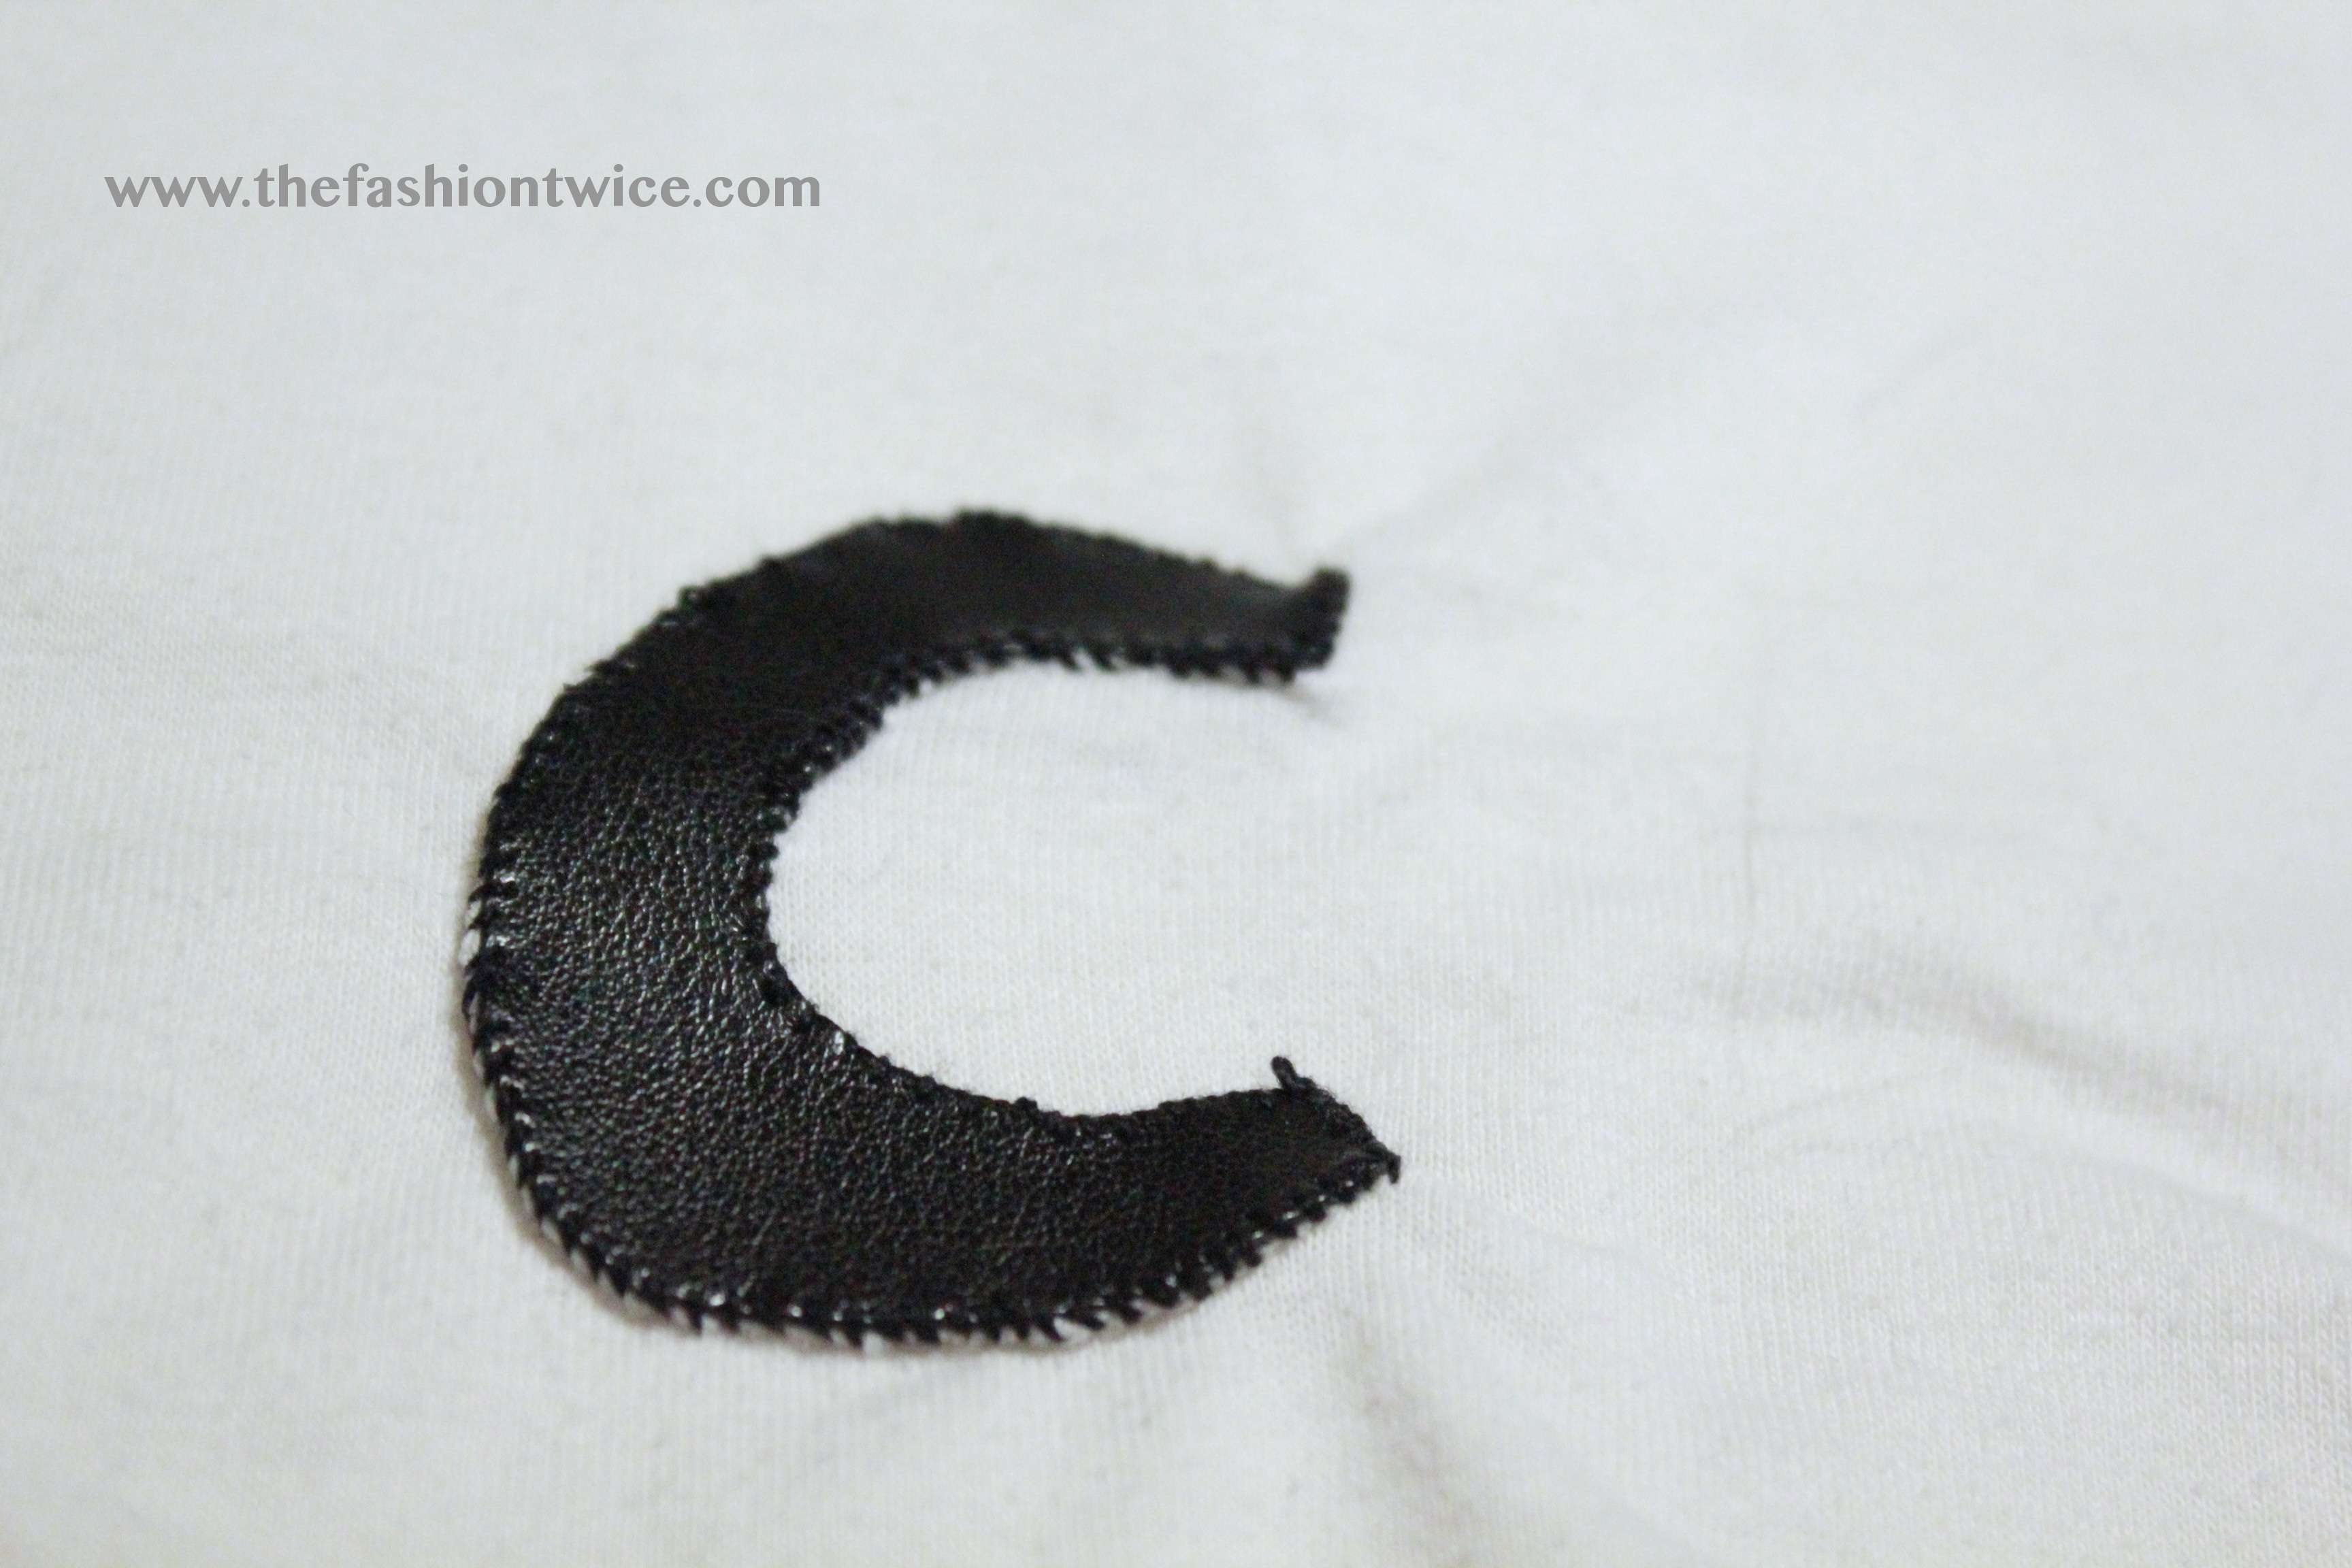
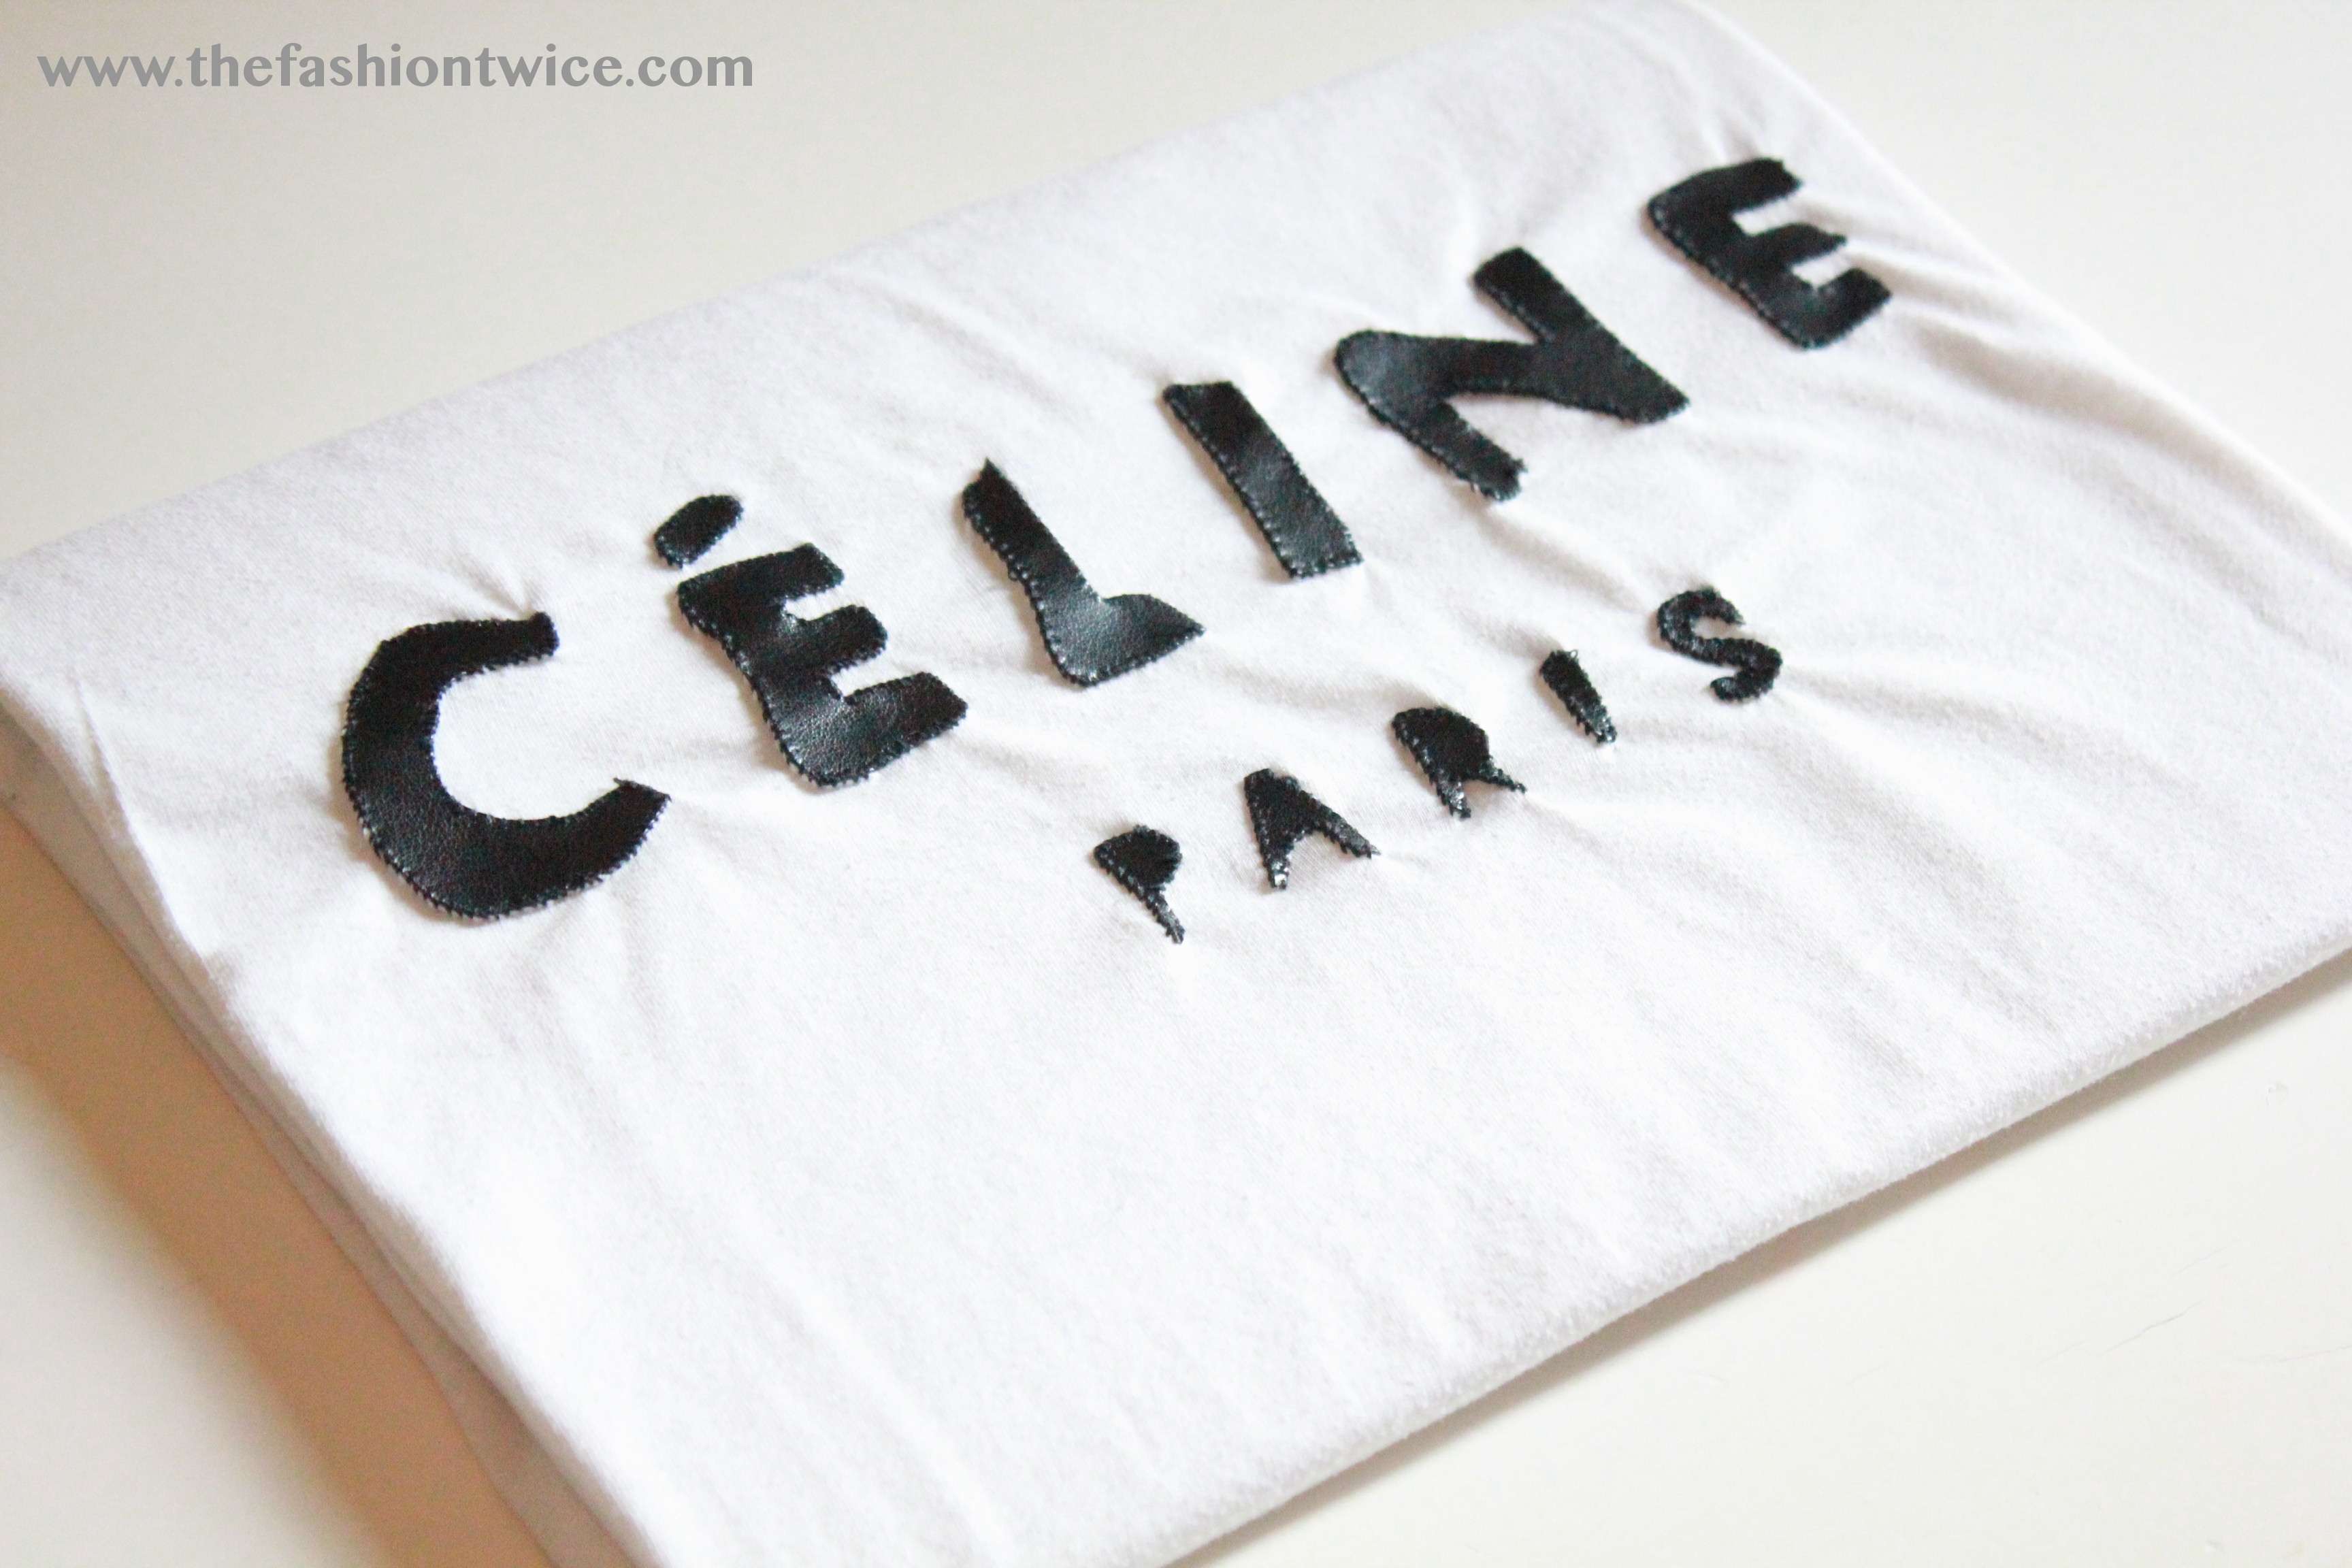
Once you finished to sew everything, your tee will look like this :)
–
Una volta cucite tutte le lettere la vostra tee somiglierà a questa :)
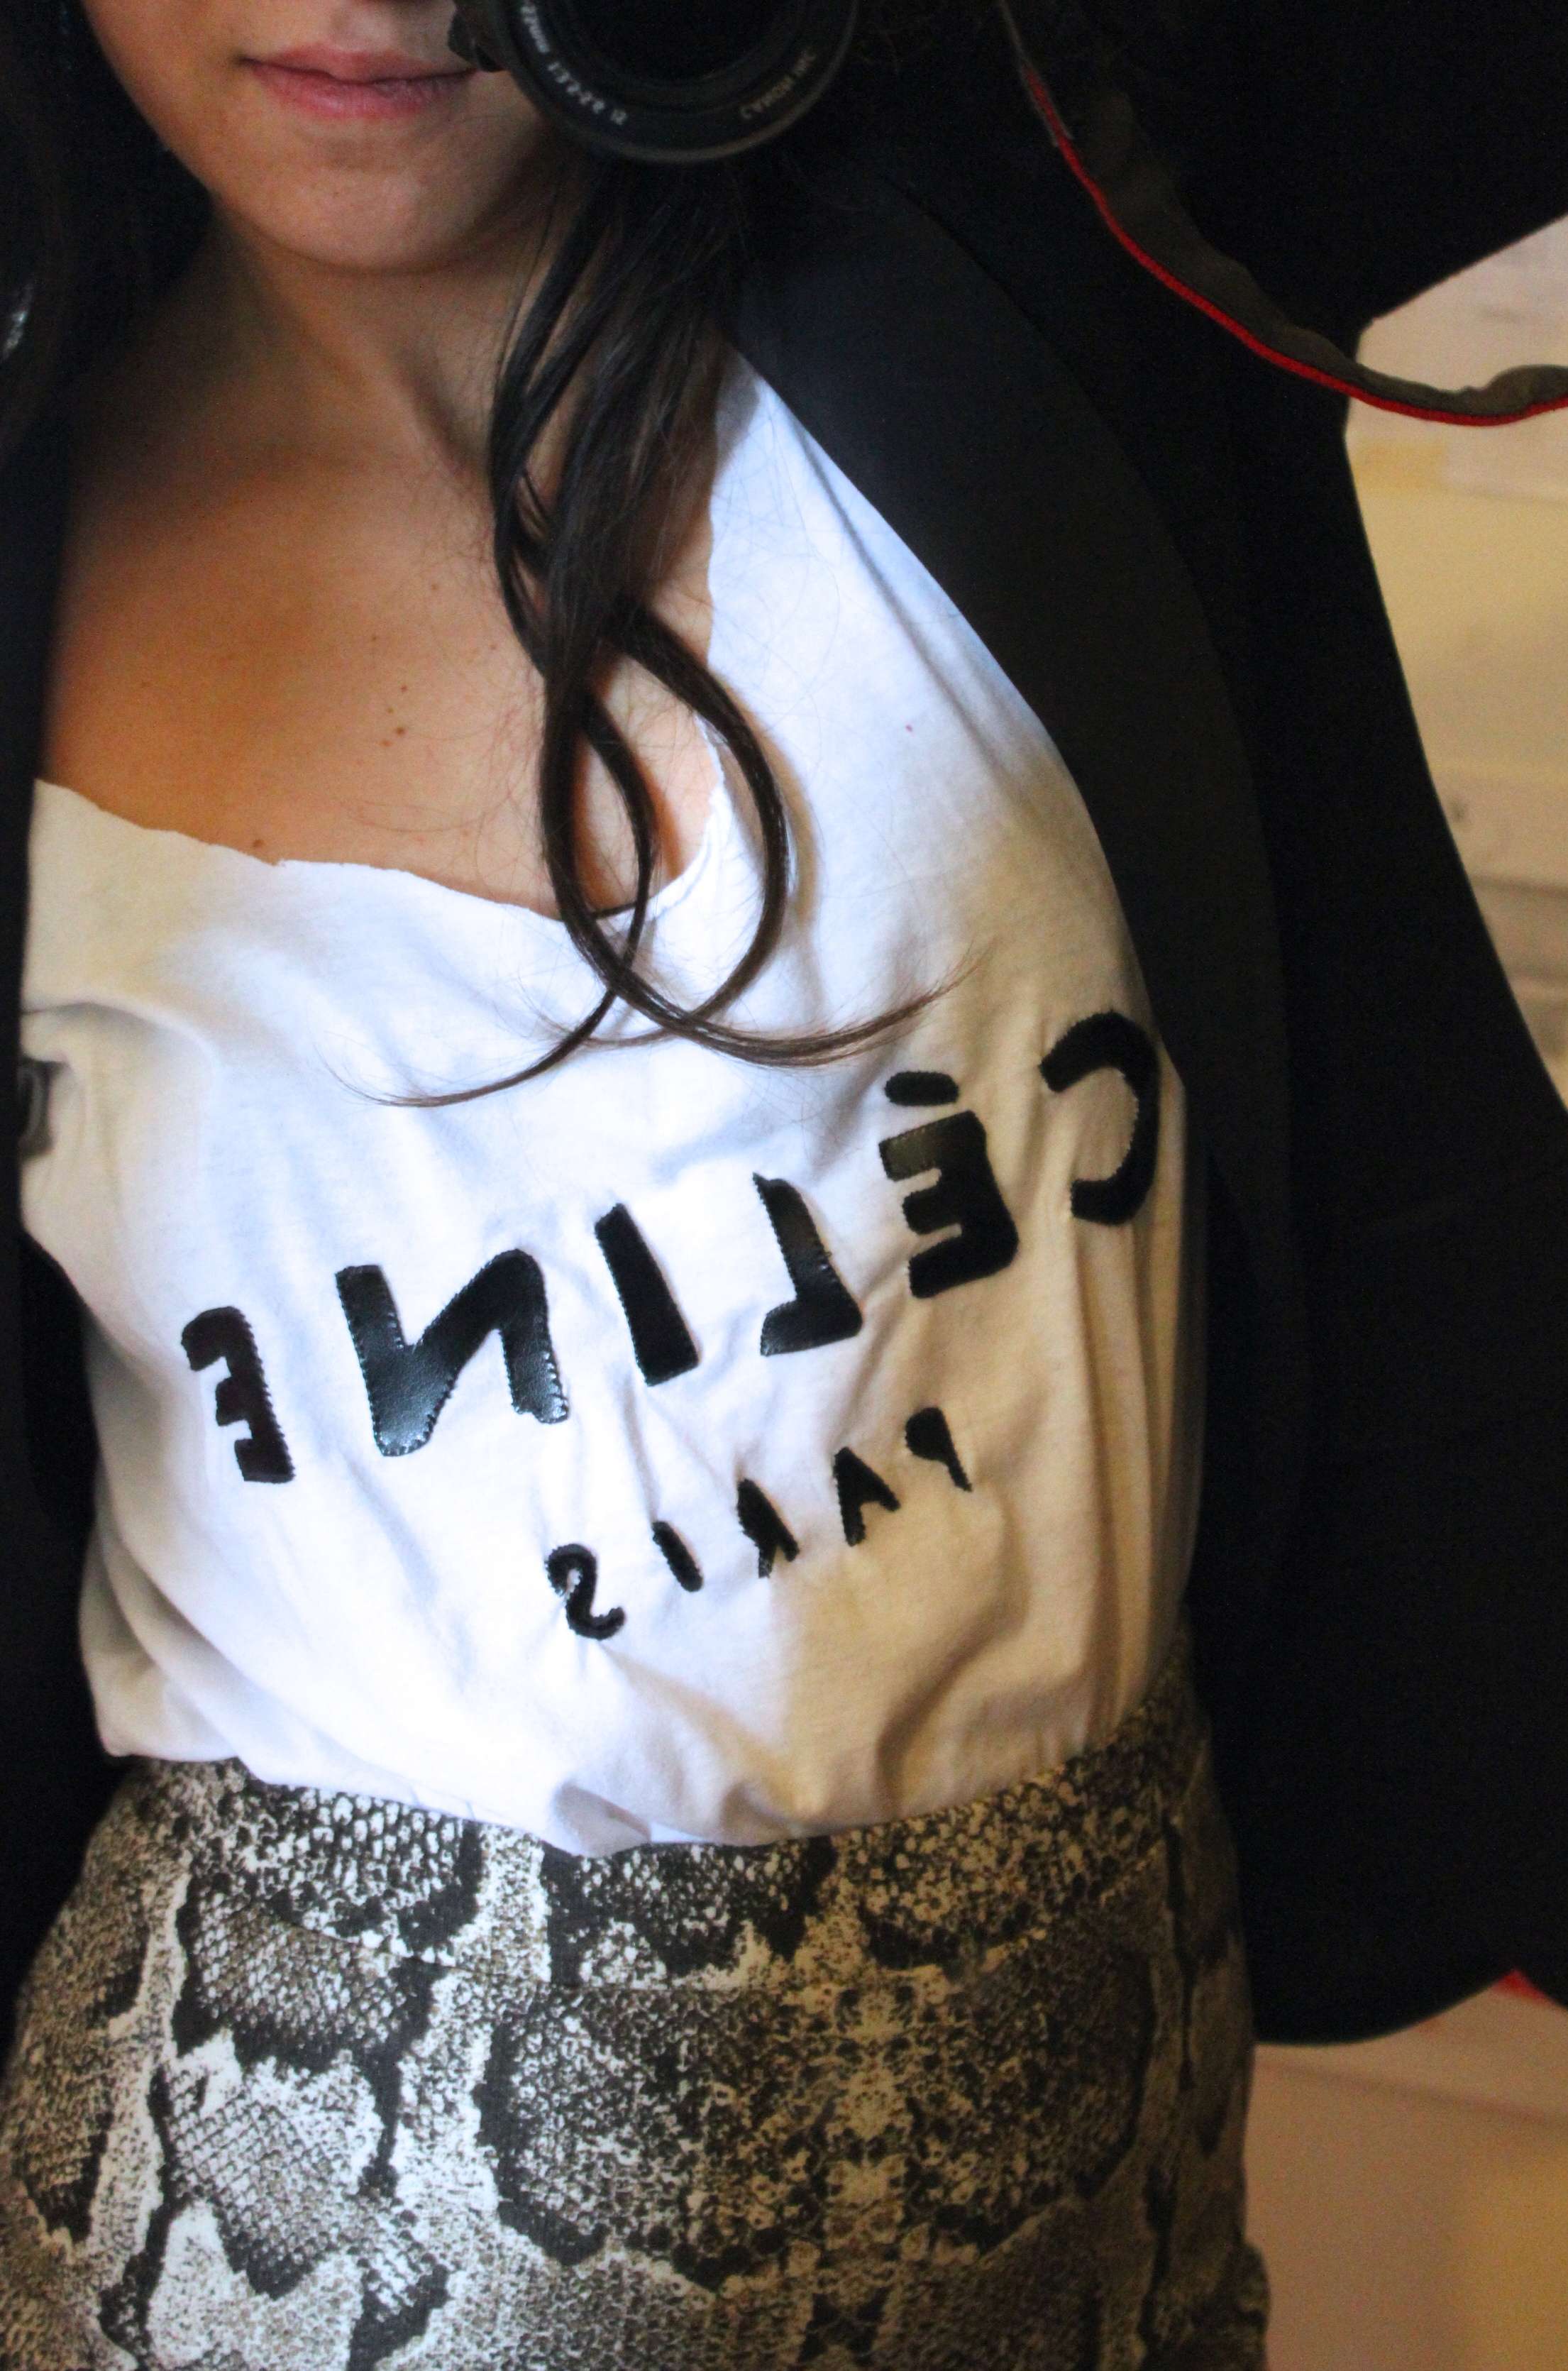
You can wear it with an high waisted skirt and blazer or with your camo pants, just spread your creativity :)
PS: Don’t forget to iron it ;)
PPS: The same project is applicable for anything you want. You can customize yor tees with leather or other fabrics :)
–
Potrete indossarla con una gonna tubino a vita alta e blazer o anche con i vostri pantaloni camo, insomma, sprigionate la vostra fantasia:)
PS: Non dimenticate di stirarla ;)
PPS: Questo progetto è applicabile per qualsiasi cosa vogliate. Potrete personalizzare òe vostre tshirt con qualsiasi tessuto o tipo di pelle, colore etc.
Baci
R.


Irene Buffa
30/11/2012sei stata bravissima!!! Mi piace :)
..and now you can read my blog also in SPANISH!
GIVEAWAY: Win a Peplum dress!
Visit my blog http://www.ontomywardrobe.com
Effe coco
30/11/2012Un lavoro da vera artigiana.queste idee mi piacciono molto ma,devo essere onesta,io mi faccio aiutare dal mio fidanzato che si disegna proprio magliette ed altro.appena posso ti faccio vedere una cs sul mio blog:-) spero ti piacera.l’idea dells pelle per personalizzarla e’ ottima.buon venerdi.
Rossella - Fashion, not victim!
30/11/2012ma tu sei troppo! mi piace da morire!
xoxo
Color-Block
30/11/2012che figa…!!questa te la rubo posso..??tra le tante che ho visto per la tee celine è la più bella..!!
un bacione
Sara Lopardo
30/11/2012Come ti ho gia detto su facebook! E’ meravigliosa:) Brava davvero :)
Ti aspetto da me ;)
http://with-out-nose.blogspot.it/
Kisses,Like a clown
Raffaella Catania
30/11/2012sei stata una grandeeee! ma ci vuole troppa pazienza non riuscirei ahah!
A NEW fashion view - Marta
30/11/2012utilissimo questo tutorial!! mi sa che proverò a realizzarla! =)
ti ho appena scoperta e mi sono iscritta subito! =)
c’è un nuovo post sul mio blog, passa se ti va! =)
A NEW fashion view
NewLife
30/11/2012Great idea – love it! Your stitching is so neat – I don’t think I would have so much patience lol. I wonder if fabric glue would work because I really love the leather embellishment.
NLxx
http://www.my-changing-room.com
Marika
30/11/2012bravissima tess non finirai mai di stupirmi!!
bacioniiii
Amanda Marzolini
30/11/2012ciao Rossella!! che bella cosa!!! molto utile!!
hanni fa ho fatto una cosa simile, ma mi è venuta male ;)ero alle prime armi ;)
davvero un bel risultato!! kiss, amy
THE FASHIONAMY by Amanda ★ ★ ★ ★ ♥♥♥♥♥♥ ITALIAN♥OUTFIT♥FASHION♥BEAUTY♥BLOG
FACEBOOK★ ★ ★ ♥♥♥
Syrious
30/11/2012brava! ti è venuta davvero molto carina!
ottima idea!
xoxo
Syriously in Fashion
Syriously Facebook Page
Silvia
30/11/2012cara è fantastica!!! mi sa che oggi pomeriggio mi metterò all’opera!!!
http://oceanandfashion.blogspot.it/2012/11/pois-on-my-panty-hose_30.html
The Fashion Curl
30/11/2012Te l’ho pubblicato! =)
Laura+Sue
30/11/2012ma dai!!!!bravissima!davvero!
Greta
30/11/2012nooo troppo carina!! brava :)
THE CIHC
THE CIHC FAN PAGE ON FB
Ilaria Caropreso
30/11/2012SEI GRANDE!!!!
♥ Tixy ♥
30/11/2012Adoro queste idee fai da te… dovresti farlo più spessoooo *__*
On The Coffee Side (Marta S.)
30/11/2012Complimets!
http://onthecoffeeside.blogspot.it/
Giulia
30/11/2012E’ stra stra stra bella!!! Complimenti per la manualità!!
xoxo
G
Sara Lopardo
30/11/2012Nuovo post sul mio blog, fammi sapere che ne pensi:)
Ti aspetto:)
http://with-out-nose.blogspot.it/2012/11/my-vintage-pull.html
kisses,
Like a clown
teresa morone
30/11/2012ma tu sei così brava e precisa!
baci
http://thefashiondiet2.blogspot.com/2012/11/my-parka-attitude.html
Fede
30/11/2012che brava ros, un po’ troppo complicata per me
I LOVE SHOPPING
ely
30/11/2012Mi sono innamorata del tuo cervello e creatività :-)
Valeria Glamourday
30/11/2012Bella idea :))))
GLAMOURDAY
GLAMOURDAY BELLEZZA
VISTANOZZE CASA AND PARTY
nat
30/11/2012Love the leather letters :)
XO Nat
[nat in love]
Valentina Coco
30/11/2012bravissima!!
http://WWW.ZAGUFASHION.COM
ZAGU FACEBOOK PAGE
bloglovin follower
lena
30/11/2012Great Ideia.
see you soon
the chilicool
30/11/2012Bello questo tutorial e tu sei bravissima!
Alessia
THE CHILI COOL
FACEBOOK
YOUTUBE
the baG girl
30/11/2012bella bella bella!
the baG girl
http://www.thebag-girl.blogspot.com!
Giusy Manzella
30/11/2012geniale! Ma sai che a me piace di più dell’ “originale”???
New Post
http://www.cheapandglamour.com
nathalie, red head.
30/11/2012Splendida idea!!
xx
NEW POST!
Red Head’s for Grazia.it ~ LINK
Facebook page ~ LINK
Instagram page ~ LINK
Berkana
30/11/2012Wow!!! Excellent idea :D
V and S (zuckerfrei).
01/12/2012Sei stata bravissima! Molto più originale così,con le lettere in pelle! :)
Mia
01/12/2012Tesoro ma è super questa maglietta…brava,brava,brava! :D
With love,Mia
New post on the BecomingTrendy//BT on Facebook // BT on Twitter
Sheila
01/12/2012Great DIY!!
xo – Sheila
http://www.sheislovelyblog.com
Dora Marotta
01/12/2012Che bella idea che hai avuto, è venuta proprio bene!
xoxo
http://blog.dorafashionspace.com
Fabrizia
01/12/2012Stupendo questo tutorial! La t-shirt è bellissima!
Mi aiuti?!Clicca qui e poi sul cuoricino rosso per votarmi!Puoi votare ogni giorno! Grazie!
Vinci una gift card da $50 da spendere su Love Obsessed!!
Giulia Pergolati
01/12/2012Mi piace molto il fatto che le lettere siano in pelle e cucite, invece di stampate sul cotone. Evita che si rovinino!
THE RED GIRL SMILE – fashion & beauty blog
THE RED GIRL SMILE come nuovo IT Blog di Grazia.it
Penelope
01/12/2012DIY favoloso tes!!
Mi sa che proverò a farla anche io, grazie per aver condiviso con noi! ;)))
Greta
NEW CONTEST on my blog!
Follow me on IL FILO DI PENELOPE
Facebook
Twitter
Bloglovin’
Alessandra Casciaro
01/12/2012Wow che pazienza! Devo dire, però, che il risultato è estremamente gradevole ed originale. Sono totalmente impedita nell’arte del “DIY”, ma voglio proprio provare a farne una.
Alessandra
Pingback: What's Up, Bro? - The Fashion Twice